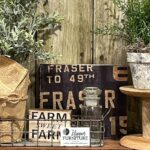
How to Use Decoupage Paper
Looking for a fun way to use decoupage paper? Look no further! These easy projects are perfect for anyone looking to have some crafting fun. From wood signs to picture frames, these projects will show you how versatile decoupage paper can be.
Instructions
- Grab your piece of wood, raw or painted, and your style of decoupage paper. Based on the size of your wood, will determine how much you will use of your paper and Mod Podge.
- Place paper over the top of your wood to determine the amount of paper you need to cut from the main sheet. I don’t measure, but you can. You just need enough to cover the entire board with a bit of overhang. For your bigger pieces of wood, you might not even need to cut your paper at all.
- Apply a nice even coat of Mod Podge. Be sure to go all the way to the edges. Completely cover the top of your board. For larger boards, you will need to work in sections, starting from the top, working your way down.
- Next grab the piece of decoupage paper you like, playing with placement before you lay it down officially. Remember, once it touches, it is very difficult to pull back up, so make sure you have it where you want it!
- Place it down, rubbing smoothly with your hands to push out any air bubbles. Make sure it completely adheres to the wood.Larger boards, you will repeat the addition of Mod Podge, applying paper, and smoothing out air bubbles in sections as you work to complete your wood sign.
- Let dry completely before removing the excess tissue paper with a sanding sponge. Simply rub along the edges to easily pull off excess.
- Grab your paintbrush and Mod Podge, and apply a thin coat on top to seal it up. Remember to keep your brush strokes all going the same direction. Let dry completely.