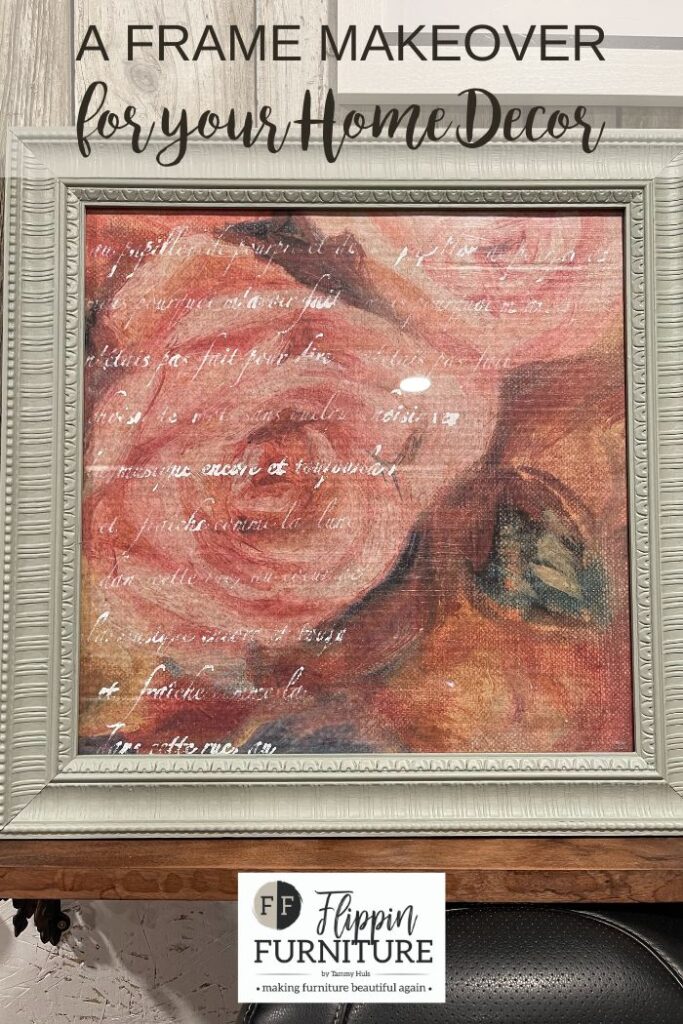
How to: DIY Picture Frame Makeover with Decoupage
If you are looking for a great new wall design without breaking the bank, then this frame makeover might just be perfect for you! I love easy and inexpensive DIY projects that deliver big results. I bought this old picture frame and made it new again!
This design is so fun and beautiful! Paying for art to hang in your home can be costly, especially for things you might actually like, but with this tutorial you can go ahead and choose whatever color paint and whatever paper design you like to make an amazing picture to hang on your wall or give as a gift! It is super easy to make and completely customizable to what you love and what matches your aesthetic.
Picture Frame Makeover
This gray frame and floral design is just perfect for my home and it turned out so pretty!
Follow along with this tutorial to see how you can do your own picture frame makeover and start hanging art all over the show!
Supplies for your Picture Frame Makeover:
- Picture Frame
- Decoupage Paper – I used Textured Floral Left. (no longer)
- Mineral Paint – I used Fusion Mineral Paint in Bellwood.
- Mineral Paint – I used Fusion Mineral Paint in Victorian Lace.
- Paint Brush
- Scissors
- Mod Podge
- Heat Gun or Blow Dryer
- Stencils – I used Butterfly Script.
- Paint Daubers
Instructions for your Picture Frame Makeover:
- Start with removing the backing and glass from your frame and cleaning your frame.
- Paint your frame with your sage colored mineral paint, making sure that all your edges are covered.
- Wait for your 1st coat to dry.
- Take your cardboard backing and lay your decoupage paper on it to find the perfect spot that you want in your frame.
- Cut the size out of your paper.
- Paint mod podge on your backing board, doing part at a time..
- Stick your cut out paper on your board so that it sticks in the mod podge.
- Add the rest of your mod podge and stick the rest of the paper.
- Smooth out any bubbles with your hand.
- Dry it with a heat gun or blow dryer.
- Cover your paper with mod podge.
- Dry it with a heat gun/blow dryer.
- Put your stencil on the paper and using your dauber, press the white paint into the stencil.
- Dry the paint.
- Put your glass back in the frame.
- Add your decorated backing back into the frame, trimming the edges if needed.
Frequently Asked Questions
What do you use to decorate a picture frame?
You can decorate and makeover your frame however you like. You can use any color paint and any design paper to add inside! This tutorial is completely customizable to you!
How do you prepare a picture frame for painting?
Depending on the type of frame, sanding a wooden frame and cleaning any frame is the way to go before painting.
DIY Frame Makeover Tutorial
Materials
- Picture Frame
- Decoupage Paper I used Textured Floral Left.
- Mineral Paint Bellwood
- Mineral Paint Victorian Lace
- Paint Brush
- Scissors
- Mod Podge
- Heat Gun
- Stencils
- Paint Daubers
Instructions
- Start with removing the backing and glass from your frame and cleaning your frame.
- Paint your frame with your sage colored mineral paint, making sure that all your edges are covered.
- Wait for your 1st coat to dry.
- Take your cardboard backing and lay your decoupage paper on it to find the perfect spot that you want in your frame. Cut the size out of your paper.
- Paint mod podge on your backing board, doing part at a time.
- Stick your cut out paper on your board so that it sticks in the mod podge.
- Add the rest of your mod podge and stick the rest of the paper.
- Smooth out any bubbles with your hand.
- Dry it with a blow dryer.
- Cover your paper with mod podge.
- Dry it with a heat gun or blow dryer.
- Put your stencil on the paper and using your dauber, press the white paint into the stencil.
- Dry the paint.
- Put your glass back in the frame.
- Add your decorated backing back into the frame, trimming the edges if needed.
Video
Just pin this frame makeover tutorial below to find the instructions later!


You May Also Like
Stenciling a Family Heirloom

Cutting Board Repurpose