DIY Campfire Sign
This cute, not-so-little, DIY Campfire Sign is perfect for anyone who enjoys making memories around a campfire. So keep reading as I teach you how to make your own with this step-by-step tutorial.
Are you a camper or a glamper? I go back and forth when I think of how I would classify myself. I loved growing up camping as a kid, but I do enjoy the luxurious camping that we have become accustomed to in my adulthood. And with every experience, the campfire is always my favorite part of it all! So if you consider yourself a true down and dirty camper… or a luxurious nature love glamper, you will love this project.
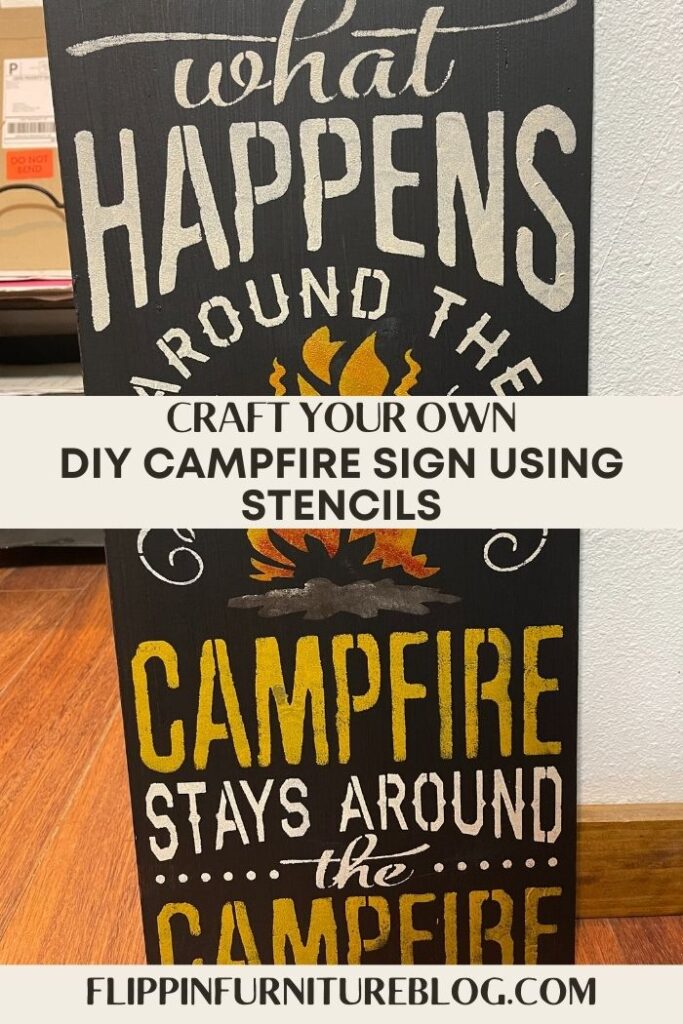
DIY Campfire Sign Using Stencils
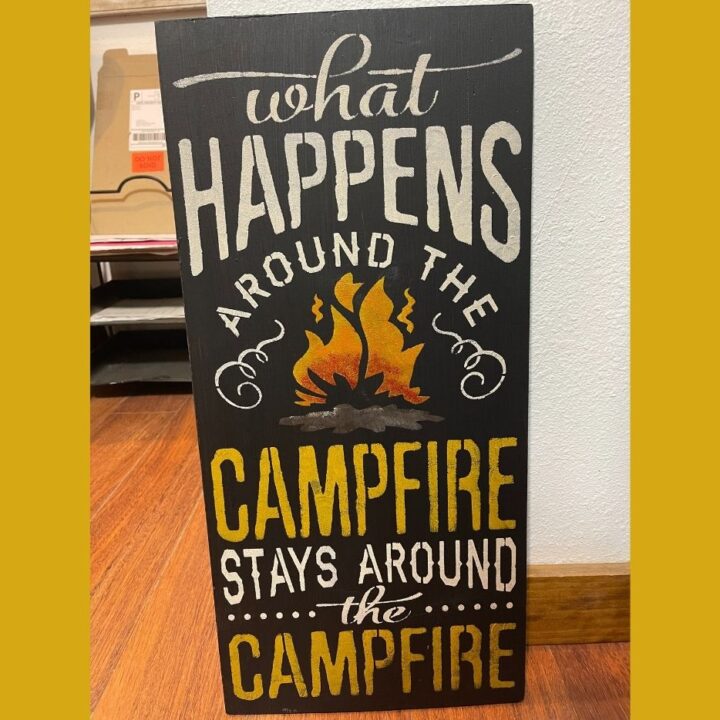
This stencil is big and bold, much like you want your campfire to be. I love how the black wooden base really helps those letters pop. The use of multiple colors within the fire seems to really make it sizzle! I can almost smell the smoke, can’t you? Stencils are such a fun and easy way to create a DIY sign for any reason, any holiday, and any decor. And yep, camping is for sure something that should have a cute sign to represent it! Are you ready to hit the next campground, or at least craft pretending that we are? I am!
This sign is one of my favorites and a top seller too! It is just so fun, so big, and so bright. Everyone loves camping. Maybe some do not enjoy the dirt and smoke, but they most assuredly love the conversations that come out around the campfire. It is always the best part. This DIY sign is perfect for anyone who loves that special experience. The best part is that you don’t need much to make this craft. Just this 1 stencil, a few colors of paint, and a large piece of wood is all it takes. You can even make this amazing sign in less time it would take you to actually build a campfire. You believe me. Let’s give it a try!
Supplies:
- Wood Board – 1×12 or big enough to fit your large stencil
- Black Paint – https://flippinfurnitureshop.com/products/coal-black-fusion-paint
- “What Happens around the CAMPFIRE” Stencil – https://www.thestencilsmith.com/products/2357-what-happens-around-the-campfire?_pos=3&_sid=91f244522&_ss=r&variant=33619318833292&aff=6
- Acrylic Paint – Master’s Touch Acrylic Paints – Dark Titanium White, mustard, tan, brown, orange, and red – https://www.hobbylobby.com/Art-Supplies/Painting-Supplies/Acrylic-Painting/Titanium-White-Master’s-Touch-Acrylic-Paint—4.1-Ounce/p/8406
- Dixie Belle Satin Clear Top Coat – https://amzn.to/3wDKf8U
- Sander
- Minwax Polyurethane Spray
Steps to Make your DIY Campfire Sign Using Stencils
- Grab your large wooden rectangular board.
- Apply a coat of black paint all over your entire board. Don’t forget your sides to give a finished look.
- Use a blow dryer or heat gun to speed up the drying process.
- Once dry, grab your desired colors for your stencils by squirting on a plate.
- Lay your stencil down on your board, paying attention to the sides if you have a tight fit like me.
- With your pouncers or finger daubers, begin to press your paint gently into your stencil in the desired areas you choose. I start with white.
- Once complete, use your mustard color to fill in the words CAMPFIRE. You can use the same pouncer or finger dauber
- Next grab your tan color and mix in a bit of brown to fill in your logs and sticks on board.
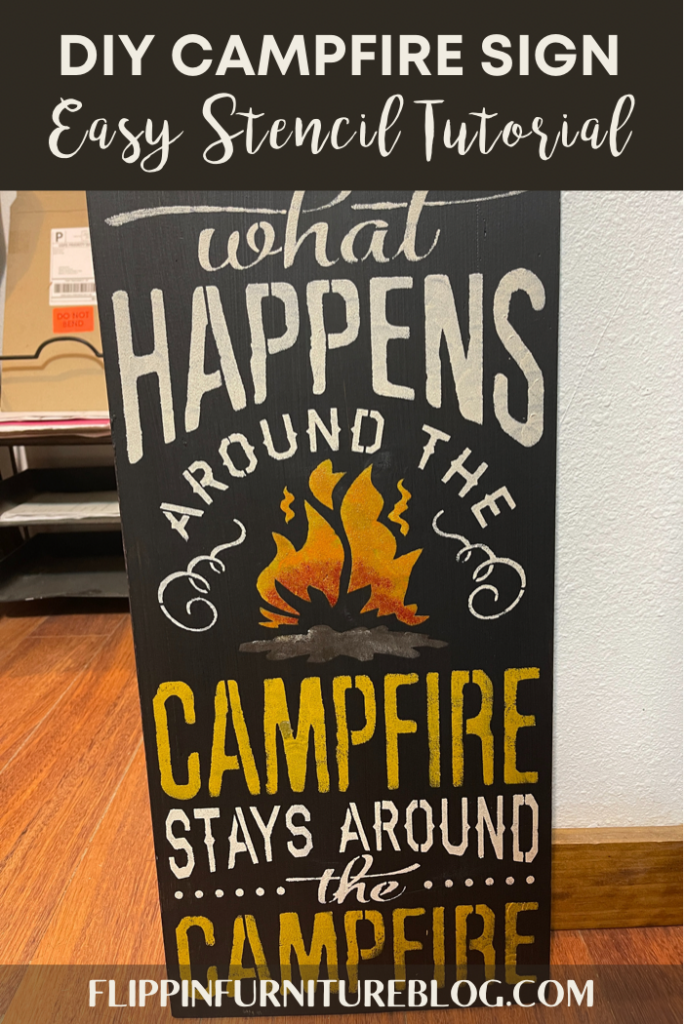
- To finish up our stencil, the fire is next. I layer colors of the mustard, orange, and reds to make the fire really pop. Play with placement as you add, remembering to be creative.
- Brighten it up where needed by going over in spots you desire, especially on outer edges of fire. Don’t go overboard!
- Once you are done filling in the stencil, pull it up carefully.
- If you want to add some texture detail to the sides of your sign, simply sand.
- Finally, spray your board with a Minwax polyurethane spray.
What Colors Are Best to Start When Working with a Multi-Colored Project?
Y’all this is such a great question. I am all about working smarter, not harder. So, paint choice for me is one way to be smart from the start! I always begin with my lightest color of paint first. That way, I can reuse the same paint pouncer or finger dauber for the entire project. You know I am not wanting to go wash out that paint as I craft… ain’t nobody got time for that!
Do I Have to Use a Finger Dauber?
I will be honest with y’all. I love me a good finger dauber. They are my very best friends when I stencil. I also enjoy using a pouncer too, from time to time. Although some people even use makeup sponges when they stencil. I don’t have the best of luck using those, but others do! I am here to tell you, to use whatever you have. Remember, think smarter, not harder. All that matters is that you are having fun, and you enjoy the process. Oh, and that you love the final product too!
DIY Campfire Sign
Create this fun DIY Campfire Sign using these tools and instructions!
Materials
- Wood Board - 1x12 or big enough to fit your large stencil
- Black Paint
- “What Happens around the CAMPFIRE” Stencil - link for WallCutz
- Master’s Touch Acrylic Paints - Dark Titanium White, mustard, tan, brown, orange, red,
- Dixie Bell Satin Clear Top Coat
- Sander
Instructions
- Grab your large wooden rectangular board.
- Apply a coat of black paint all over your entire board. Don’t forget your sides to give a finished look.
- Use a blow dryer or heat gun to speed up the drying process.
- Once dry, grab your desired colors for your stencils by squirting them on a plate.
- Lay your stencil down on your board, paying attention to the sides if you have a tight fit like me.
- With your pouncers or finger daubers, begin to press your paint gently into your stencil in the desired areas you choose. I start with white.
- Once complete, use your mustard color to fill in the words CAMPFIRE. You can use the same pouncer or finger dauber
- Next, grab your tan color and mix in a bit of brown to fill in your logs and sticks on board.
- To finish up our stencil, the fire is next. I layer colors of mustard, orange, and reds to make the fire really pop. Play with placement as you add, remembering to be creative.
- Brighten it up where needed by going over in spots you desire, especially on the outer edges of the fire. Don’t go overboard!
- Once you are done filling in the stencil, pull it up carefully.
- If you want to add some texture detail to the sides of your sign, simply sand.
- Finally, spray your board with a miniwax polyurethane spray.
Just pin this DIY Campfire sign tutorial below to find the instructions later!


You May Also Like
How To Stencil A Pumpkin Fall Sign

Cutting Board Repurpose