Vintage Locker Cabinet,
Hey! This is one of my favorite makeovers! I don’t normally make time to go chasing after furniture or any items anymore however these were a different story.
I think I saw them pop up in my Facebook feed and about fell out of my chair. They were cheap. $20 EACH. And they had three of them!!! SOLD Yes, please…I’ll take them all!!!! We got really lucky that I could fit them all into my SUV or I would have had to go back for my trailer. I was not going to let these slip through my fingers.
We set up the time to meet and it was a done deal. I absolutely love lockers in all shapes and sizes! My daughter and I picked them up from a local school from their Shop Class. They had been using the cabinets for storage and had recently gotten new, so they no longer needed these. SCORE!!!
The vision for this cabinet was mine, but I have to give my builder credit for the hard parts!
First, I had my builder put on low profile casters so it could roll easily because they have some weight to them so I felt it would be a definite bonus for whoever was lucky enough to snatch them up.
Second, I had him add the thick lumber on top. The thick lumber added 2″ to the height of the piece.
So, once he put on the casters and the wood top, it was back to my workshop…
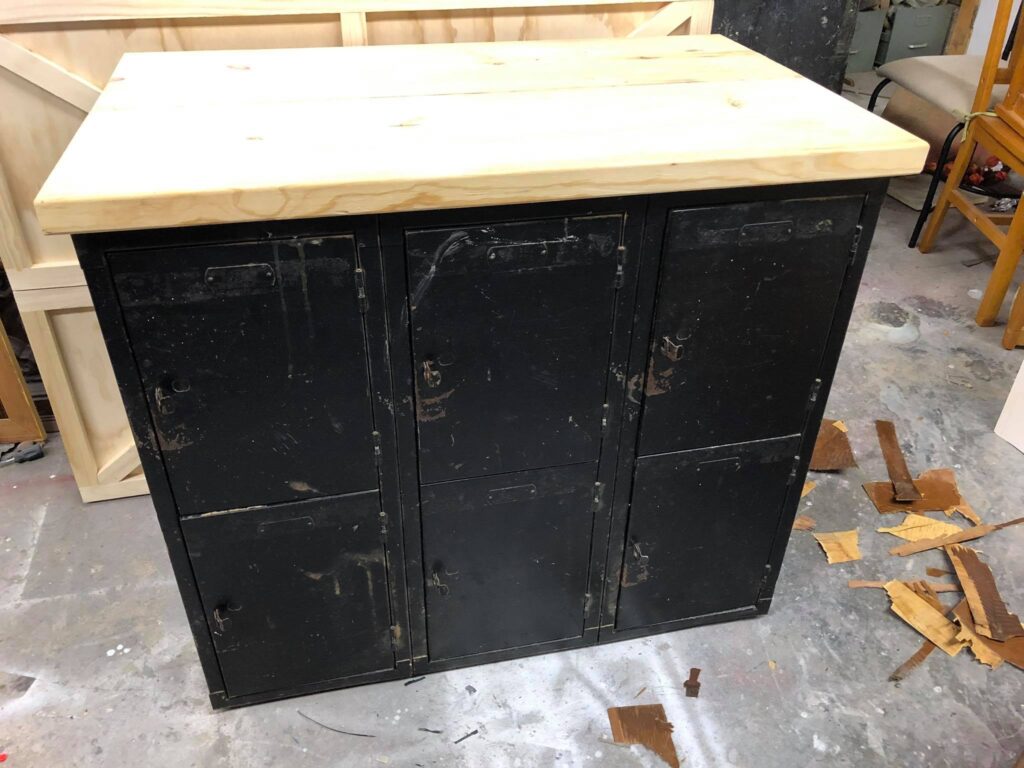
Unfortunately, I do not have hardly any pictures of project in progress. This was before I started blogging so I did not realize at the time that pictures along the journey are a great thing to have! Learning as I go!
I actually did not do a whole lot to the cabinets themselves. I’m usually about the path of least resistance.
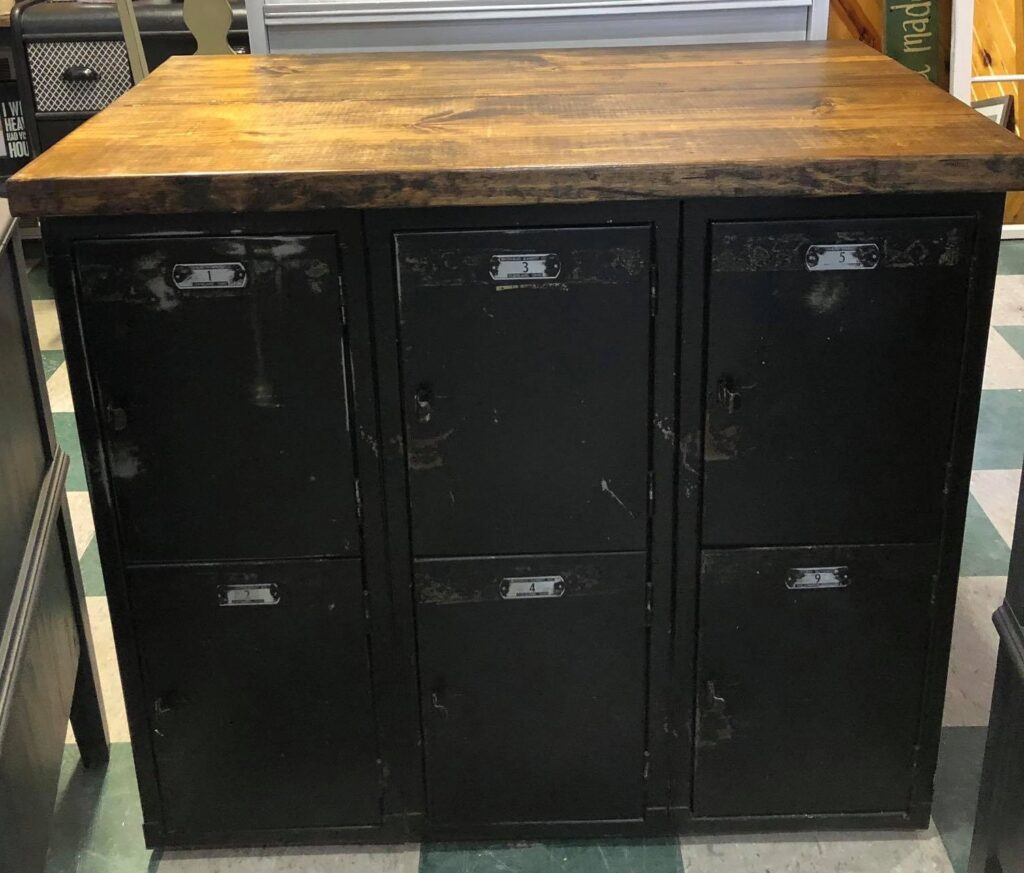
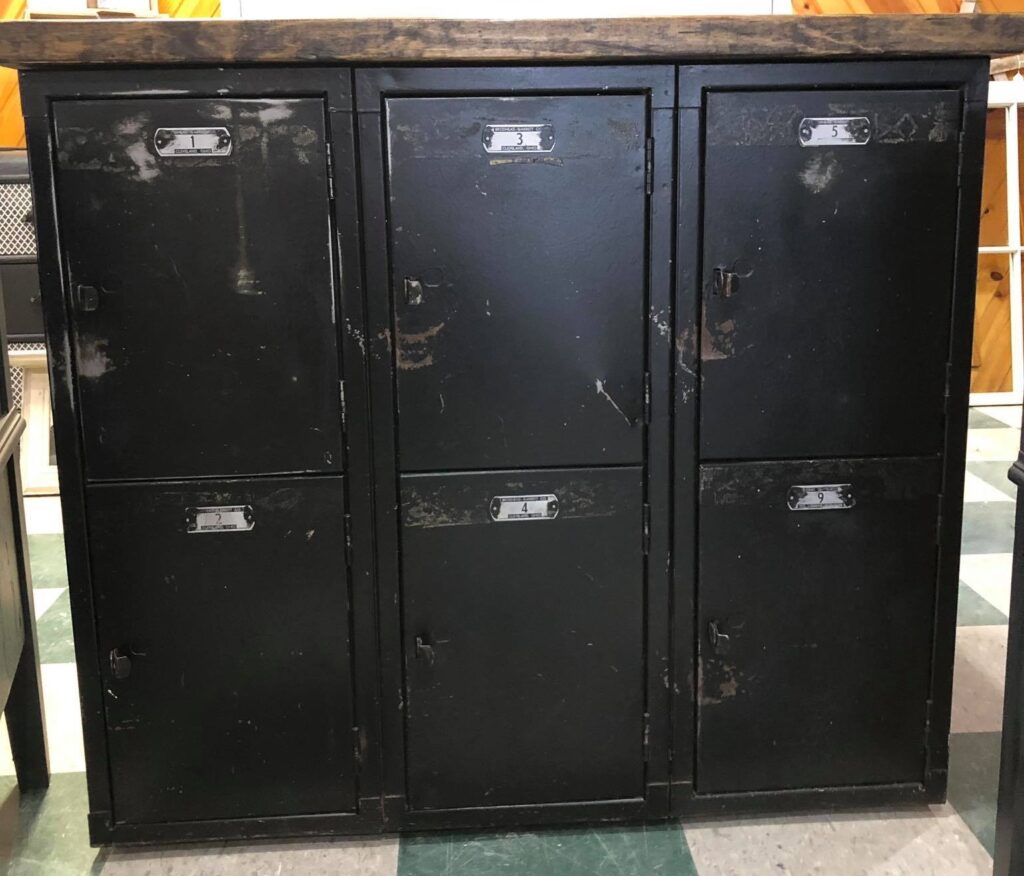
To start, I sanded the whole locker with my little mouse sander. I went pretty aggressively except for where the numbers were. I pushed gently there, just enough to sand off the paint so you could see the numbers again. If you sanded too hard, you could sand the number completely off and I did not want that! The numbers add to the cool factor, for me anyway!
After I sanded the whole thing and washed it all down, I was in love with how it looked. I thought about painting it, but I just felt it was perfect and I wasn’t going to mess with perfection. Once dry, I sprayed a couple coats of Minwax Fast Drying Polyurethane, letting dry between coats.
Afterwards, it was time to work on the wood top. I stained it with Minwax Stain in dark walnut. I let the stain dry overnight and then sealed it. You could use any number of sealers on there. I used Minwax Polycrylic in Satin and brushed it on, letting dry a couple hours between coats. I think I ended up putting on 3 coats.
Supplies:
This list contains affiliate links, if you make a purchase I make a commission, your price stays the same.
- Tool Shop Mouse Sander (Menards)
- Minwax Spray Polyurethane Satin – https://amzn.to/2w9iw2V
- Minwax Polycrylic Satin – https://amzn.to/2UEzSi3
- Minwax Stain – Dark Walnut – https://amzn.to/2UIqOc2
- Paint Brush – https://amzn.to/2SCPJLq
And that’s all folks! I did all 3 cabinets the same way and all three found homes right away! I wish I could have kept one, but I already have a full house! ?