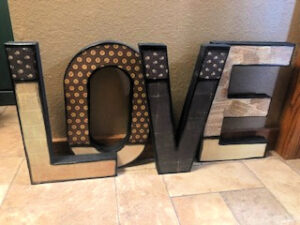
DIY Paper Mache Valentine’s Day Letters,
Looking for a quick Valentine’s Day décor project? I gotchu Boo!
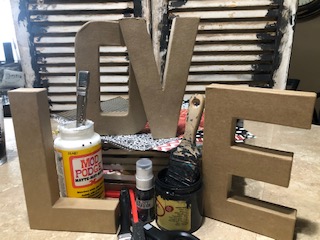
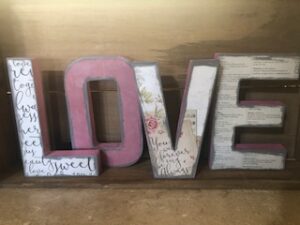
OK, these are a super easy, fun, home decor project! You can do them to match the colors of the season or the colors of your home, etc. I have done our last name in reds and greens to use in Christmas photos, and 2′ tall letters that spell ‘LOVE’ that have hung over our headboard for several years now. Just some ideas to get your creative juices flowin!
Let’s Get Started!
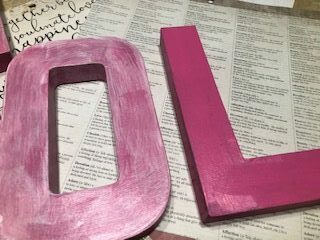
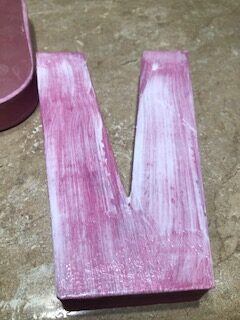
The first thing I did was paint the letters pink. You can use a foam brush or regular paint brush or even spray paint. I did front and back. You really wouldn’t have to. You could get by with just doing the edges but apparently I was an overachiever this day. I should have picked my papers first. If so then I would not have had to do the next step…
If I had picked out my papers first, I would have chosen a different pink or altered it to match a little better. But since I didn’t, I went over the pink with Miss Lillian’s white wash to make them marry together better. I just put it on with a cheapo foam brush.

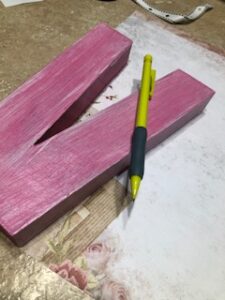
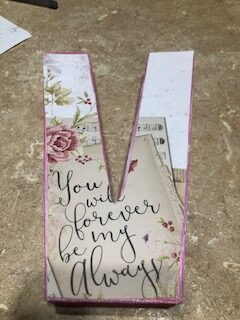
After they were dry, I traced around each letter onto the desired scrapbook paper with a pen or pencil and then cut it out.
If you are happy with your cut out and it fits, the next step is mod podging. Slather onto the paper mache letter and then lay your cut out paper down on top of it, being careful to keep air bubbles out. You will want to keep pushing down on these with your fingers to make sure it is all adhesed to the paper mache. I also take a paper towel around my finger and wipe away any excess they may have been pushed out. Make double sure that all your edges have mod podge under them.
Once they are dry, you can then take your sanding disk to rough up the edges. Be somewhat gentle so as not to tear your paper. Sand in one direction, toward the outside of the letters, if that makes sense.
For this project, I then took a little bit of the gray on the end of my foam brush and just lightly added it to all the edges. Sometimes I just sand and leave it. Just depends on the look I want.
After the gray paint dries, you will put on your second and final coat of mod podge and you are done!
Supplies
This list contains affiliate links, if you make a purchase I make a commission, your price stays the same.
- 8” Tall Paper Mache Letters — L, O, V, & E – https://amzn.to/2viyFT4
- Matte Mod Podge – https://amzn.to/41qRm3w
- Pink Acrylic Paint
- Gray Acrylic Paint
- Miss Lillian’s White Wash Glaze – https://misslillianspaint.net/miss-lillians-antiquing-glaze/
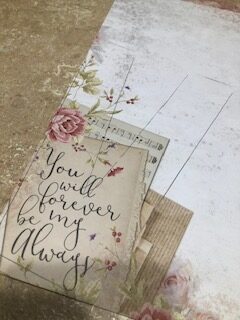
- Scrapbook Papers — (I used Kaisercraft “floral romance” paper pad for this project. (Hobby Lobby))
- Scissors
- Foam Brushes – https://amzn.to/2tK0T8M
- Sanding Disk – https://flippinfurnitureshop.com/products/paint-sticks-fusion?_pos=3&_sid=0b98db19a&_ss=r
- Paper Towels
How do you like it? Please let me know if you try it! Bonus points for showing me pictures!!

3 Comments
Kim jo es
These are adorable ❤?
Flippin Furniture Blog
Thank you Friend!!! I love making them!!!
Terri0
“Love, Love, Love” it! ❤