Learn to stencil your own sign
Being able to stencil your own sign is such a great way to get the decor you want in your home! I am going to show you how to make a new stenciled wood sign. You are going to love how easy and simple this technique is!
There are so many times I am out shopping and want all the signs that are displayed for sale. If they aren’t discounted then I am not buying them. That is because I know that I can do them cheaper myself. Once you learn how to stencil a wood sign you too with all this thought next time you are browsing a store.

How To Stencil A Wood Sign
The technique of stenciling onto wood is SOOO simple y’all. So simple my husband, the farmer can even do it. We did a couple of signs together last year and the DIY zipcode sign was my favorite we did together.
Supplies:
- Scrap Wood or lumber of any shape and size
- Fusion Mineral Paint or Stain
- Brown, Black and Tan Master’s Touch acrylic paint
- Stencils – My Favorites are from the Stencilsmith!
- Paintbrush
- Heat Gun/dryer
- Finger daubers
- Fast Drying Acrylic Minwax Spray Seal
Steps:
- Prep your lumber by cutting it to size, sanding the lumber, and wiping clean of debris, staining it, and then… we get to the fun part. Stenciling!
- Grab your desired size scrap lumber. Depending on the size stencils you have will determine which size scrap lumber you want to use.
- With some dark brown* paint, give a base coat to your piece of scrap wood. Cover completely. Don’t forget to do the sides. *You can skip this step and stencil on raw, rough wood too.
- Let your paint dry or use a heat gun to speed up the drying process.
- Touch up any spots that you may have missed.
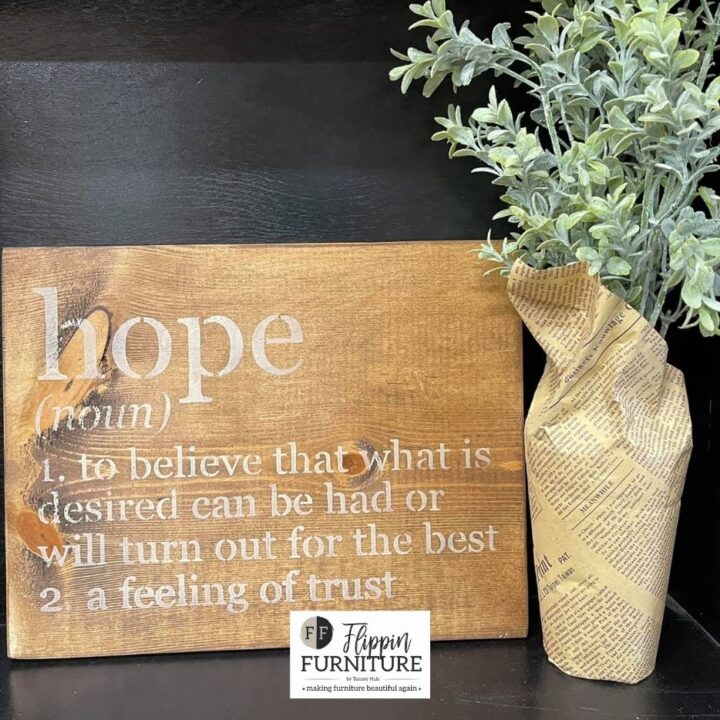
- Once dry, apply your “Hello Sweet Cheeks” stencil to the center of your board using the tan* acrylic paint. Using light taps with very limited paint on your finger daubers to help it from bleeding through. We can go in and add a floral stencil later or even some twine to add some embellishments.
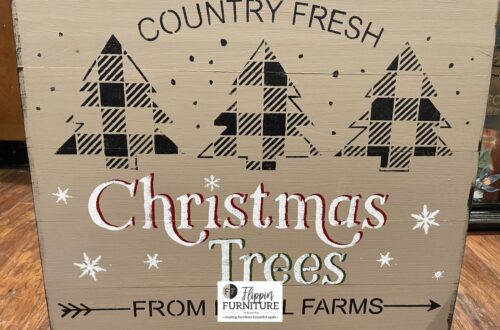
- Repeat steps to create as many of your stenciled signs as you like. For my second one, I kept the raw wood look. I only stenciled on the parts of the stencil that I liked. I simply ignored the parts I didn’t want to use. “Please remain seated for the duration of the performance.” Potty humor is the best.
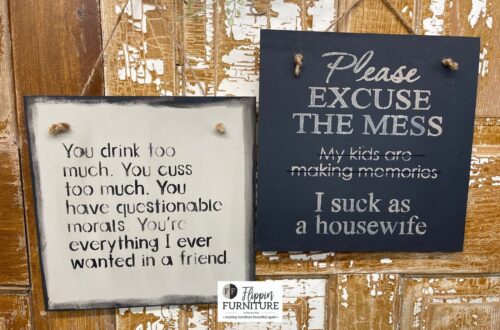
- Repeat to make all your different signs. I made several home phrases.
- Once completely dry, you can spray seal your painted wooden signs with a clear poly. You could skip this step entirely, but I like the finished look it provides.
- Last but not least, enjoy your Stenciled Signs. So simple and so cute.
Do I have to use only one color when stenciling?
When stenciling it is ok to not use only one color when stenciling a sign. You can mix and match those colors to your heart’s content. You could highlight bold words with other colors of paint to help it stand out. For me, I am a plain Jane kind of girl, so I tend to keep it simple. But you do what you like best! That is the beauty of stenciling. So much room for creativity and interpretation.
Stencil Your Own Sign
Materials
- Scrap Wood or lumber of any shape and size
- Satin Paint for base coats of any color
- Brown, Black and Tan Master’s Touch acrylic paint -
- *or your choice based on your personal home decor
- Stencils - Bathroom Humor/ Home Decor Phrases
- * Or your choice
- Paintbrush
- Heat Gun/dryer
- Finger daubers
- Fast Drying Acrylic Minwax Spray Seal
Instructions
- Prep your lumber by cutting it to size, sanding the lumber, and wiping clean of debris, staining it, and then… we get to the fun part. Stenciling!
- Grab your desired size of scrap lumber. Depending on the size stencils you have will determine which size scrap lumber you want to use.
- With some dark brown* paint, give a base coat to your piece of scrap wood. Cover completely. Don’t forget to do the sides. *You can skip this step and stencil on raw, rough wood too.
- Let your paint dry or use a heat gun to speed up the drying process.
- Touch up any spots that you may have missed.
- Once dry, apply your “Hello Sweet Cheeks” stencil to the center of your board using the tan* acrylic paint. Use light taps with very limited paint on your finger daubers to help it from bleeding through. We can go in and add a floral stencil later or even some twine to add some embellishments.
- Repeat steps to create as many of your stenciled signs as you like. For my second one, I kept the raw wood look. I only stenciled on the parts of the stencil that I liked. I simply ignored the parts I didn’t want to use. “Please remain seated for the duration of the performance.” Potty humor is the best.
- Repeat to make all your different signs. I made several home phrases.
- Once completely dry, you can spray seal your painted wooden signs with a clear poly. You could skip this step entirely, but I like the finished look it provides.
- Last but not least, enjoy your Stenciled Signs. So simple and so cute.
Can I use a makeup sponge to stencil?
Yes, yes you can. But I do prefer to use the Finger Daubers I buy on Amazon. I think they are just easier and keep my craft projects so much cleaner. Some people like brushes, too.
Now that we are done, how many spots are in your house, are you planning to create a stenciled sign for now?
Just pin this How to stencil a sign tutorial below to find the instructions later!


2 Comments
Bernie
Can’t wait to try this.
Jayne
Thank you for this! Love those signs 🥰