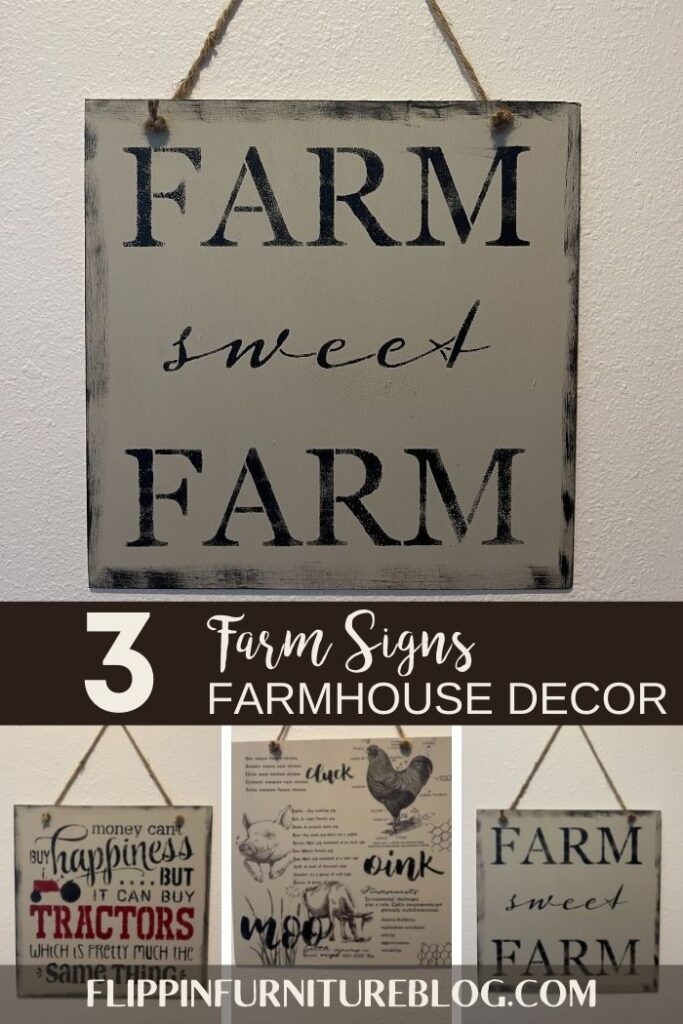
DIY Farm Signs
Get ready to fall in love with these DIY farm signs that are super simple and perfect for any farm decor you are going for.
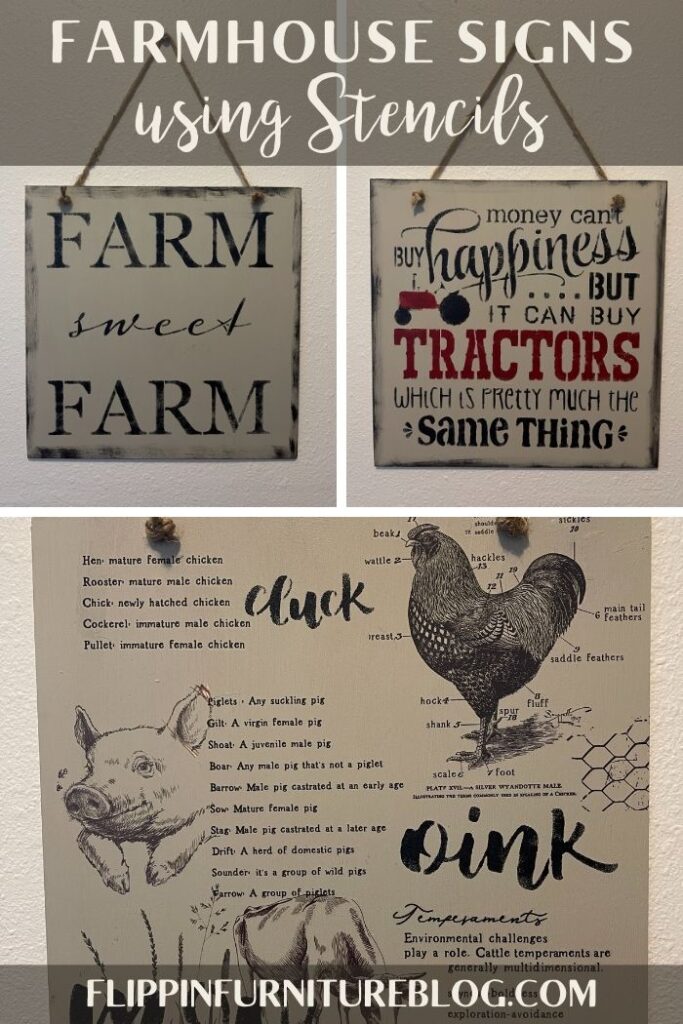
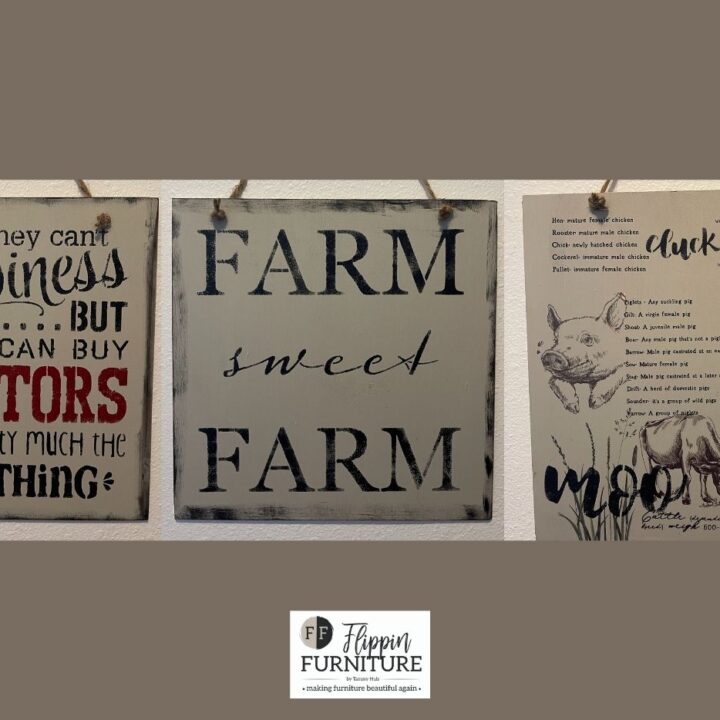
These DIY Farm Signs cover all the aspects of that hardworking lifestyle and adorable decor. Whatever you are, farm or city folk, these signs are perfect for that farm lifestyle you love to live. Or you are longing for in your daily life. From “Farm Sweet Farm”, “Cluck Oink Moo”, and “Tractors.”
Let me be very clear with you from the beginning about farm living! It is not easy y’all! Rising early, resting late. Down and dirty from dusk to dawn. But… These DIY Farm Signs… They are NOT HARD at all! These farm-themed stencils and transfers are just the best. So with just a few supplies, some time, and my step-by-step tutorial, you can have these Farm Signs as your new decor with little effort. And I will say it again. There is not much on the farm that requires little effort. So are you ready to get to work?
Make Your Own Farm DIY Signs
At first, I was a bit bummed at how thin these wood signs were when I got them in the mail. I remember being frustrated that I wasted my money. But y’all, they are so PERFECT for this DIY craft using stencils. They are so lightweight, that easily adding the hanger was not too much work at all. I love that this set of 3 signs can all be hung on one wall of my home, or throughout it.
No matter where I place them, they will look good. They will keep the Farm theme and decor consistent no matter the space. That is what I want for my home. I want it to truly feel like the sign says, “Farm Sweet Farm.”
Supplies:
- Wood Board Panels
- Algonquin Paint
- “Farm Sweet Farm” Stencil
- “Cluck Oink Moo” Stencil
- Farm Life Transfer
- “Tractor” Stencil
- Transfer Tool
- Master’s Touch Acrylic Paints – Black & Red
- Finger Daubers
- Sander
- Twine
- Electric Drill
How To Make Your Own DIY Farm Signs
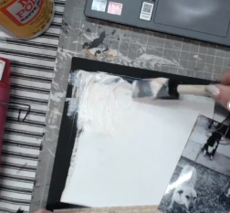
- Grab your thin wooden boards and apply a base coat of paint. You determine the color(s) that works best for your decor. I went with a light tan because I am a neutral kind of gal.
- Dry completely. Use a blow dryer or heat gun to speed up the drying process.
- Once dry, grab your desired color(s) for your stencils by squirting on a plate.
- On our first DIY Farm Sign, Apply your stencil, “Farm Sweet Farm” in place on your board.
- With your pouncers or finger daubers, begin to press your paint gently into your stencil. I just used black for this sign.
- Once complete, gently remove your stencil. Set aside to get started on your other DIY Farm Signs.
- Bring over your next tan/cream board to complete your 2nd DIY Farm Sign.
- Determine which farm animal transfer pieces you want to add to your board – cut out your chicken, pig, and cow! Remember to be careful to not let your transfer get ruined by touching anything with the back paper removed.
- Once you have created a visual representation of what you want your board to look like as a finished product, begin with your first transfer. Apply your transfer by resting in place, pressing firmly with your tool so the transfer adheres nicely.
- Repeat as you stack all of your transfers on your board. I love the chicken wire accent all throughout.
- To finish up, grab your stencil and with your finger daubers add those cute animal saying sounds to add some fun to your DIY board.
- Don’t be afraid to layer and have fun with it.
- For your 3rd DIY Farm Sign, determine your tractor color. I chose red, but you do what you like best.
- Begin to add your paint colors, determining what words you want to pop with more attention. Be extra careful since this stencil has so many tiny spots that would allow for bleeding through. Use a finger dauber to help with this!
- Apply that distressed look on your outer edges of the sign. Use a baby wipe to help if you add a little too much in one spot. You could even sand down those edges too if you prefer that look.
- Once finished with these signs, apply a spray polyurethane to help these cute signs to have a finished look.
- When dry, poke two holes into the tops of your board using a tiny drill bit. Use craft leather cord to pop through holes. Create a hanger for these DIY Farm Signs to be displayed in your home for all to admire.
What is the Difference Between a Finger Dauber and a Pouncer?
I love them both so much, and they might not seem like they are different, but y’all, they are. The finger daubers are best for tiny areas to stencil. Those areas that don’t have a lot of negative space between the images or lettering are best stenciled when using a finger dauber. Projects with multiple colors being stenciled are easily accomplished with a finger dauber, as well. A pouncer is foamier and has a larger area to allow more paint coverage to be used on signs that may only need 1 color. I like to use them also to create the perfect round polka dot too for certain projects. But to be honest, sometimes I will just use what is around because that is just my style. Ha! Give them both a try…I sell both.
What Paint Should I Use When Stenciling?
When I am stenciling, I have always really loved to work with Master’s Touch from Hobby Lobby. It only takes 1 coat and I love how easy it is to finish a craft. But, that doesn’t mean that I don’t use other brands of acrylic paint. To be honest y’all, my crafting style is mostly, use what is around. On these boards, I actually used some old furniture paint for my base coat because it was open.
No one will know what you are using, if you just use whatever it is, well. Don’t go using finger paints now… stay smart, not a smart alec. Just remember to have fun with and be creative.
DIY Farm Signs
Wanting to learn how to make your own DIY vintage farmhouse signs? With this easy DIY Farm Signs tutorial, you will learn how to create three different farmhouse signs that you can place in your home or gift to a friend who also loves rustic, country decor. To get started, check out the simple step by step guide and video to see how it's done.
Materials
- Wood Board Panels
- Base coat of your choice of color paint - light tan/cream
- “Farm Sweet Farm” Stencil
- “Cluck Oink Moo” Stencil
- Farm Animal Transfers
- “Tractor” Stencil
- Prima Transfer Sheet Flat Edge Tool
- Master’s Touch Acrylic Paints - Black & Red
- Finger Daubers and Pouncers
- Sander
- Leather chord
- Electric drill
Instructions
- Grab your thin wooden boards and apply a base coat of paint. You determine the color(s) that works best for your decor. I went with a light tan because I am a neutral kind of gal.
- Dry completely. Use a blow dryer or heat gun to speed up the drying process.
- Once dry, grab your desired color(s) for your stencils by squirting on a plate.
- On our first DIY Farm Sign, Apply your stencil, “Farm Sweet Farm” in place on your board.
- With your pouncers or finger daubers, begin to press your paint gently into your stencil. I just used black for this sign.
- Once complete, gently remove your stencil. Set aside to get started on your other DIY Farm Signs.
- Bring over your next tan/cream board to complete your 2nd DIY Farm Sign.
- Determine which farm animal transfer pieces you want to add to your board - cut out your chicken, pig, and cow! Remember to be careful to not let your transfer get ruined by touching anything with the back paper removed.
- Once you have created a visual representation of what you want your board to look like as a finished product, begin with your first transfer. Apply your transfer by resting in place, pressing firmly with your tool so the transfer adheres nicely.
- Repeat as you stack all of your transfers on your board. I love the chicken wire accent all throughout.
- To finish up, grab your stencil and with your finger daubers add those cute animal saying sounds to add some fun to your DIY board.
- Don’t be afraid to layer and have fun with it.
- For your 3rd DIY Farm Sign, determine your tractor color. I chose red, but you do what you like best.
- Begin to add your paint colors, determining what words you want to pop with more attention. Be extra careful since this stencil has so many tiny spots that would allow for bleeding through. Use a finger dauber to help with this!
- Apply that distressed look on your outer edges of the sign. Use a baby wipe to help if you add a little too much in one spot. You could even sand down those edges too if you prefer that look.
- Once finished with these signs, apply a spray polyurethane to help these cute signs to have a finished look.
- When dry, poke two holes into the tops of your board using a tiny drill bit.
- Use craft leather cord to pop through holes. Create a hanger for these DIY Farm Signs to be displayed in your home for all to admire.
Just pin this DIY Farm Signs tutorial below to find the instructions later!