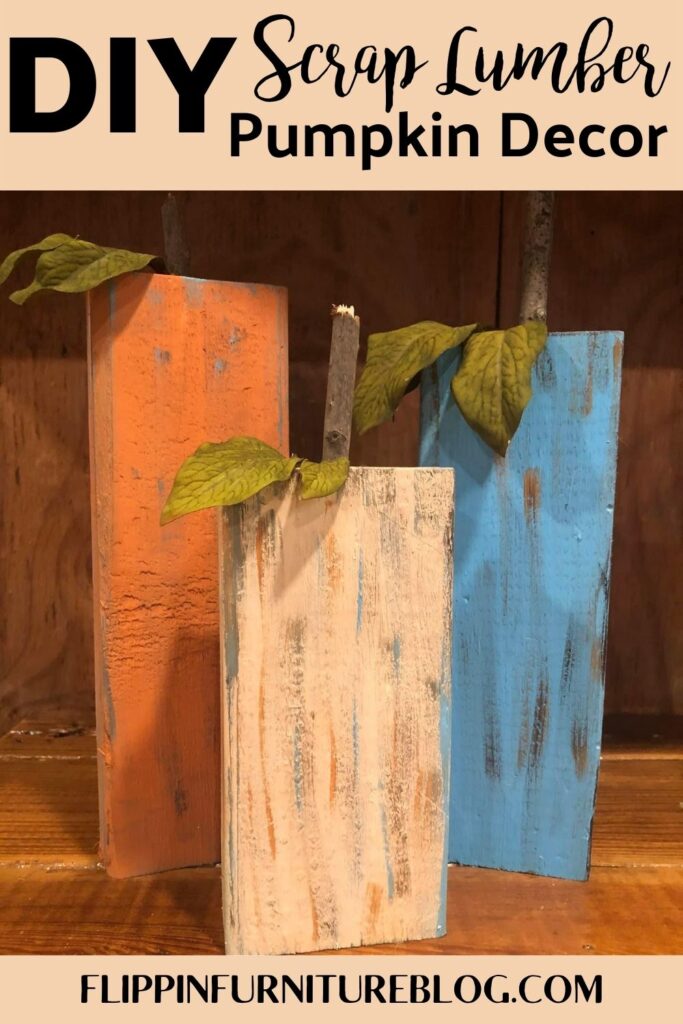
DIY Scrap Lumber Pumpkin Decor
These scrap lumber pumpkin decor are a great way to use up wood from the yard while creating unique fall decor for your home. See how easy it is today!
Fall decor is something I love putting out each year. Almost as much as decorating for Christmas. When looking for new things to decorate with each year I always try to do it on a budget. That is why I thought these scrap pieces of lumber would make the cutest pumpkin decor.
These wood pumpkins are the perfect way to spruce up your space, and they’re also a great craft for kids of all ages! If you want some more fall inspiration, check out How to make your own DIY Halloween Boo Sign that will for sure help get your creative juices flowing this fall. Happy crafting!
DIY Scrap Lumber Pumpkin Decor
If you are like me and enjoy the fall season, then this DIY Scrap Lumber Pumpkin Decor is perfect for you. Pumpkins are traditionally carved with a knife. But if you’re looking for a new spin on Halloween decor this year then you will want to give these a try.
Follow along and make this cute little pumpkin decoration yourself!
Supplies needed for your Scrap Lumber Pumpkin Decor:
- Scrap lumber of all sizes
- Random sticks
- Electric drill and bit
- Orange, turquoise blue, off white paint
- Foam paint brushes
- Faux leaves
- Hot glue gun
Scrap Lumber Pumpkin Decor Instructions:
- Grab 3 different pieces of your desired sizes of scrap lumber.
- Next with an electric drill and the appropriate size drill bit, make a hole large enough to fit your stem right in the top of the scrap lumber later in the project.
- Once you have drilled all your holes, wipe free of any debris.
- Grab your orange paint and paintbrush. Paint your tallest piece.
- Load your hole up with some hot glue, and slide your stem and faux leaf/leaves right down inside. Hold in place as glue hardens.
- Set aside to dry.
- Repeat steps of painting your next scrap lumber piece with your turquoise blue paint, or paint color of your choice. Remember to wipe your scrap lumber clean before painting.
- Insert stem and leave with a large amount of hot glue in the hole.
- Paint your last piece of scrap lumber with an off white. Have some fun with it by bringing in a bit of blue paint from your other brush to tie your pumpkins together a bit.
- Repeat steps to add stem and leaves.
- To give your pumpkins an antique look, dry brush a bit of brown and your turquoise blue on your orange pumpkin. Streak here and there.
- Wipe a bit with a paper towel if needed. Be sure to really highlight your edges on your pumpkins.
- Repeat the streaking, dry technique on your blue pumpkin with a bit of orange and brown to highlight your edges, continuing with your antique look.
- On your white pumpkin, use brown, blue, and orange to highlight the edges to complete the set of your painted lumber pumpkins.
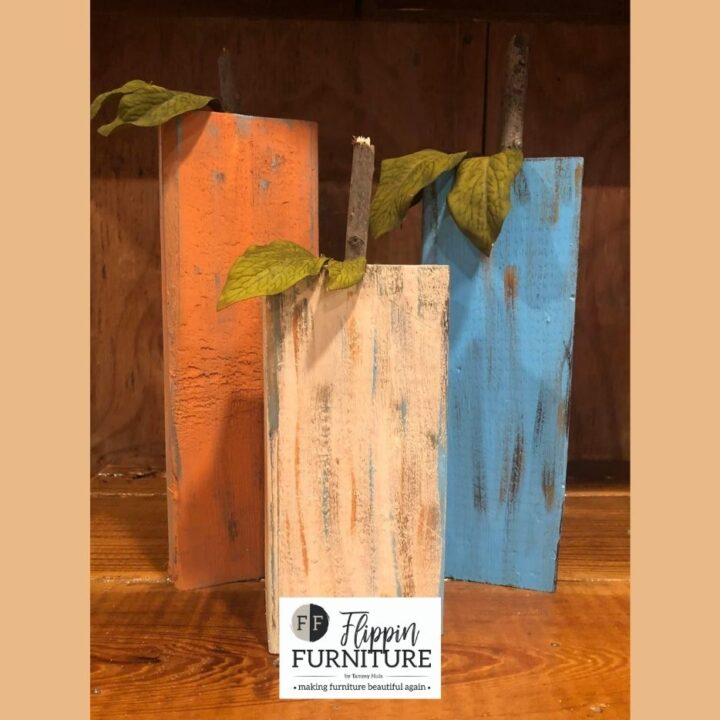
- Pair your set together, accentuating their uniqueness in color and height.
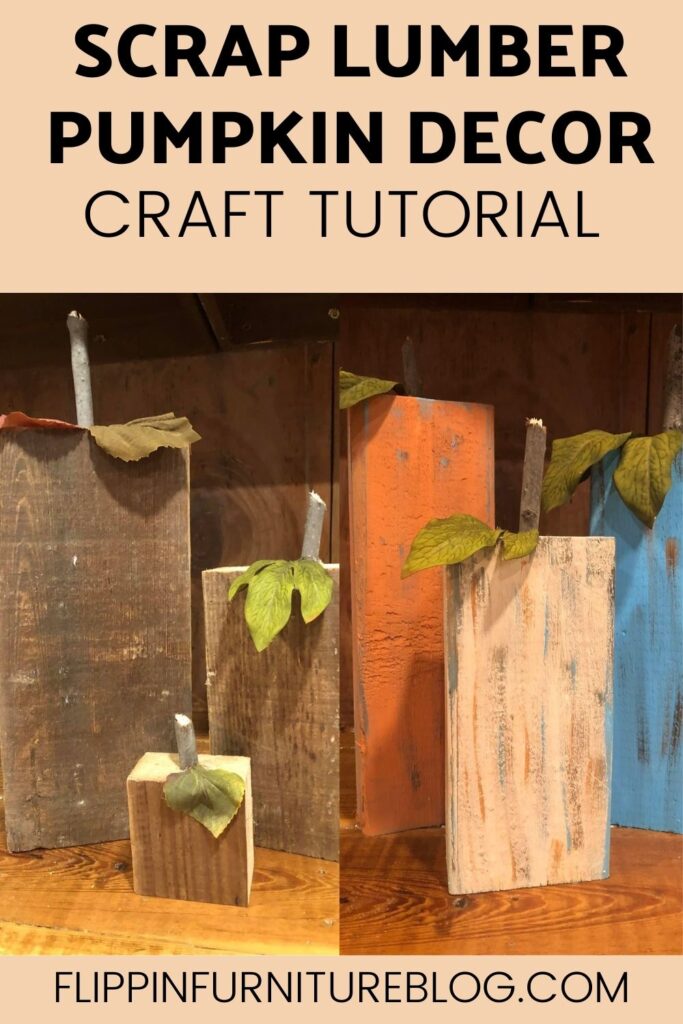
How to create pumpkins with a more rustic look:
I had some old lumber that was near and dear to my heart, so I just couldn’t paint it. But I just couldn’t let it sit there taking up space, either. So a rustic set of pumpkins was what I created to solve those challenges, and I am so pleased.
- Simply, skip the step of painting. Be sure your lumber scraps are different sizes to create your set.
- Repeat steps with drill, inserting stems, and leaves.
- Play with your leaf types and sizes before officially gluing in place.
- I love this look as a complete set, just as much as my painted pumpkins.
Have fun and let your creativity soar as you take scrap pieces of lumber to make some amazing pumpkin decor! Set up an assembly line and mass produce these. Once you have plenty made, sell them at a craft show or gift them to friends. You will love setting these out year after year!
Just pin this DIY Scrap Lumber Pumpkin Decor tutorial below to find the instructions later!
Scrap Lumber Pumpkin Decor
Learn how to make these scrap lumber pumpkin decor with this craft tutorial.
Materials
- Scrap lumber of all sizes
- Random sticks
- Electric drill and bit
- Orange, turquoise blue, off white paint
- Foam paint brushes
- Faux leaves
- Hot glue gun
Instructions
- Grab 3 different pieces of your desired sizes of scrap lumber.
- Next with an electric drill and the appropriate size drill bit, make a hole large enough to fit your stem right in the top of the scrap lumber later in the project.
- Once you have drilled all your holes, wipe free of any debris.
- Grab your orange paint and paintbrush. Paint your tallest piece.
- Load your hole up with some hot glue, and slide your stem and faux leaf/leaves right down inside. Hold in place as the glue hardens.
- Set aside to dry.
- Repeat steps of painting your next scrap lumber piece with your turquoise blue paint, or paint color of your choice. Remember to wipe your scrap lumber clean before painting.
- Insert stem and leave with a large amount of hot glue in the hole.
- Paint your last piece of scrap lumber with an off-white. Have some fun with it by bringing in a bit of blue paint from your other brush to tie your pumpkins together a bit.
- Repeat steps to add stem and leaves.
- To give your pumpkins an antique look, dry brush a bit of brown and turquoise blue on your orange pumpkin. Streak here and there.
- Wipe a bit with a paper towel if needed. Be sure to really highlight the edges on your pumpkins.
- Repeat the streaking, dry technique on your blue pumpkin with a bit of orange and brown to highlight your edges, continuing with your antique look.
- On your white pumpkin, use brown, blue, and orange to highlight the edges to complete the set of your painted lumber pumpkins.
- Pair your set together, accentuating their uniqueness in color and height.


You May Also Like

Memorial Day Floral Arrangement On The Fly
DIY Winter Decor Sign