Spooky Book Set Halloween Decor Tutorial
Follow along step by step as I show you how to make the perfect, creepy little addition to your Spooky Book Set Halloween Decor. A simple craft to make for yourself or as a gift for a Halloween loving friend like me!
Do you love Halloween as much as I do? Do you love the cute little happy pumpkins of Halloween sitting on a gate or the darker side of Halloween with fear that builds as you hear the music of Michael Meyers? I am all for the spooky side, and this little DIY project is perfect for capturing that scary vibe in the simplest of ways.

DIY Spooky Book Set Halloween Decor
Any decor with wood is a win in my book. Add a seasonal spooky element to it, and it is like hitting the decor jackpot. This DIY Halloween Spooky Book Set is my new favorite project in my home and I know you will love it too.
Using old scrap wood and my letter stamps, I am able to create new Halloween decor that will look great on my mantle, kitchen table, bookshelf, or front entryway. The beauty of this project is you get to decide how spooky or playful you want your Halloween book set to be. Changing your book titles, and even paint color can give you an entirely new vibe.
Just follow the steps below and get creative! One question though, will you be listening to spooky Halloween songs as you craft?
Supplies needed for your Spooky Book Set Halloween Decor:
- 3 wooden blocks – scrap lumber
- Black paint
- Paintbrush
- Heat Gun/dryer
- Letter Stamps
- StazOn Ink Pad – white
- Sanding block
- Fast Drying Acrylic Spray Seal
Instructions on making your Halloween decor:
- Grab your desired size wood block. You can use scrap wood if you like. I am using pieces that are the exact same size.
- With some black paint, give a base coat to your 3 wooden blocks. Cover completely. Don’t forget to do the sides.
- As you are painting, be thinking of what spooky book titles you want to have on your books! I am a Michael Meyers fan. Are you?
- Dry completely with a heat gun/dryer to speed up the process.
- Touch up any spots that you may have missed.
- With your letter stamps, plan on what you want your spooky book spines to read. Play with placement until you are satisfied. You can measure it out if you are extra precise, or eyeball it like me. I think the improper placement adds to the creepiness.
- With your white ink pad, begin stamping out your first book. Letters should be shifted towards the left of the spine, leaving an empty space on the right section of wood blocks. I am writing “Michael.”
- For my second book, I will stamp out “Meyers.” To finish my set, I am stamping out “Returns.” I love it!
- To distress your books, grab your sanding block and rub along the edges. Distress as much as you like.
- Carefully wipe your blocks of any debris, paying attention not to smear your stamps.
- Hot glue your wooden blocks together to form your complete spooky book set, one block at a time.
- Grab some twine, jute, string, or even ribbon of your liking, and unravel a bit so you have some to wrap easily. Apply a thin line of hot glue to start your wrapping, to help it stay in place. Wrap around several times to make it thick. Cut and hot glue the end to secure.
- Embellish your spooky book set with a little foam pumpkin, or any halloween accessory you desire, hot glued right on top.
- Spray seal your painted wooden blocks with a clear poly.
- Last but not least, enjoy your simple and Spooky Halloween Book Set!

Halloween Spooky Book Set Décor
Learn how to create your own spooky book set Halloween decor for your home!
Tools
- 3 wooden blocks - scrap lumber
- Black paint
- Paintbrush
- Heat Gun/dryer
- Letter Stamps
- StazOn Ink Pad - white
- Sanding block
- Fast Drying Acrylic Spray Seal
Instructions
- Grab your desired size wood block. You can use scrap wood if you like. I am using pieces that are the exact same size.
- With some black paint, give a base coat to your 3 wooden blocks. Cover completely. Don’t forget to do the sides.
- As you are painting, be thinking of what spooky book titles you want to have on your books! I am a Michael Meyers fan. Are you?
- Dry completely with a heat gun/dryer to speed up the process.
- Touch up any spots that you may have missed.
- With your letter stamps, plan on what you want your spooky book spines to read. Play with placement until you are satisfied. You can measure it out if you are extra precise, or eyeball it like me. I think the improper placement adds to the creepiness.
- With your white ink pad, begin stamping out your first book. Letters should be shifted towards the left of the spine, leaving an empty space on the right section of wood blocks. I am writing “Michael.”
- For my second book, I will stamp out “Meyers.” To finish my set, I am stamping out “Returns.” I love it!
- To distress your books, grab your sanding block and rub along the edges. Distress as much as you like.
- Carefully wipe your blocks of any debris, paying attention not to smear your stamps.
- Hot glue your wooden blocks together to form your complete spooky book set, one block at a time.
- Grab some twine, jute, string, or even ribbon of your liking, and unravel a bit so you have some to wrap easily. Apply a thin line of hot glue to start your wrapping, to help it stay in place. Wrap around several times to make it thick. Cut and hot glue the end to secure.
- Embellish your spooky book set with a little foam pumpkin, or any Halloween accessory you desire, hot glued right on top.
- Spray seal your painted wooden blocks with a clear poly.
- Last but not least, enjoy your simple and Spooky Halloween Book Set!
See how simple and spooky? It is so easy that this DIY craft can be done with your little ones too. Have them paint your wooden blocks and you handle the “Hard stuff” of stamping. This would even be a great craft to do with friends from the neighborhood, as you chat about who had the best Halloween decor the year before while enjoying some creepy finger foods to set the mood. And you know, Halloween decor is always the most fun to create, at least in my opinion! Are you as excited for Halloween as I am?
Just pin this Spooky Book Set Halloween Decor tutorial below to find the instructions later!


You May Also Like
How to Stencil on Metal
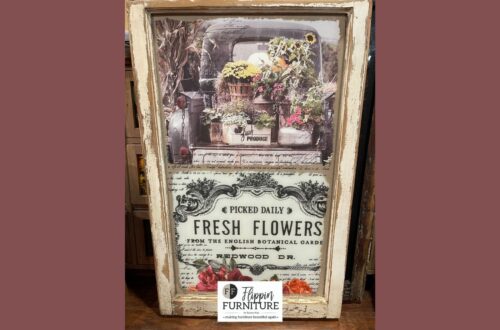
Upcycle a Window Using Transfers