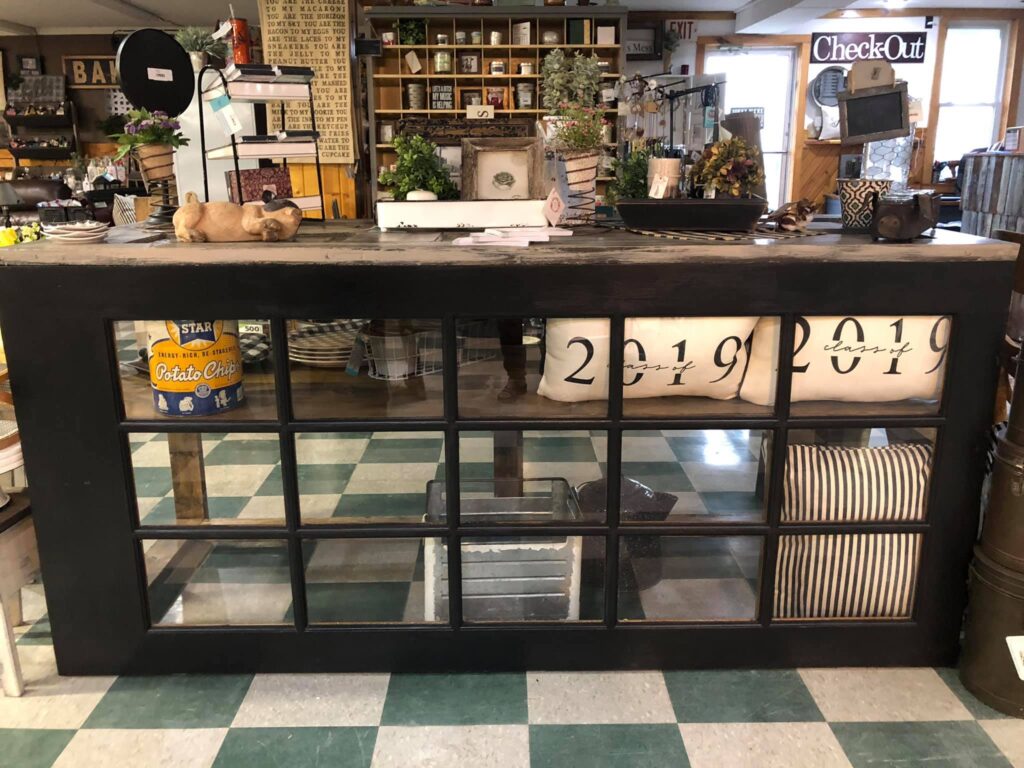
French Door Island,
I adore this French Door Island! This is the second one I’ve finished. The first island I finished was in white, and it had a floor, whereas this one is open on the bottom. I think I like having a floor in there better (even though it is mega heavy), but either way, such a cool piece.
I am not a carpenter, so all the glory of putting this together goes to my builder friend, Roger. I show him my ideas and he makes it happen. He’s good like that. Everyone needs a “Roger” in their life. I brought him an old panel door and a French door. He pulled it all together.
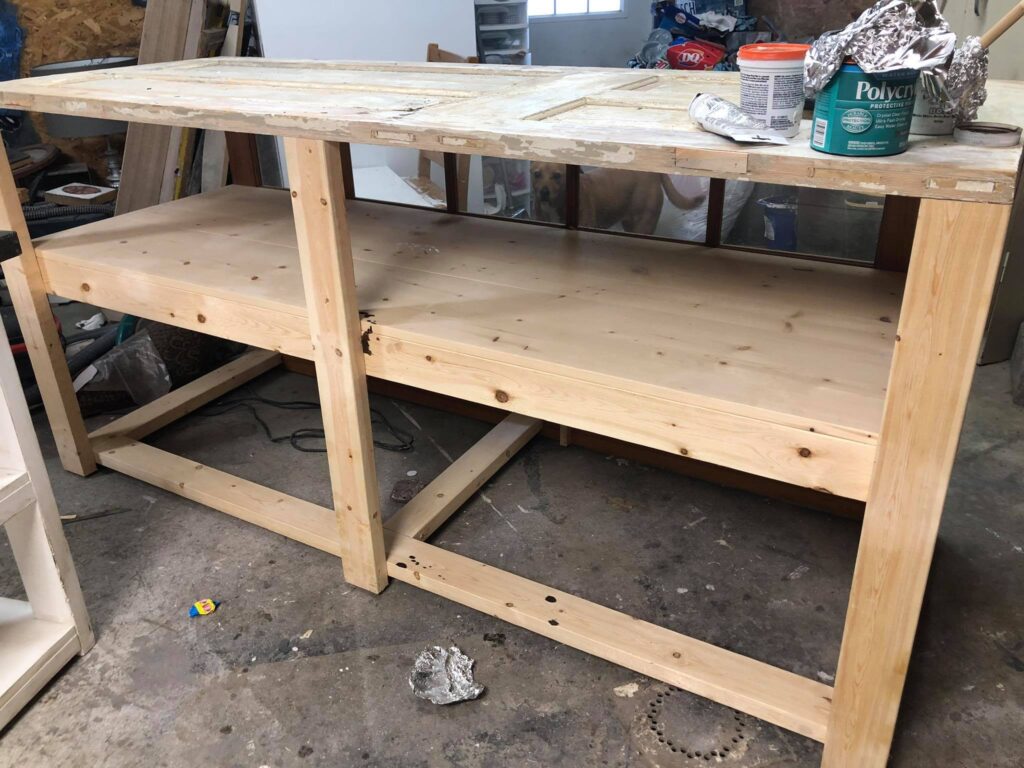
Once I brought this project back to my garage, it was time to get started. Since I had already done a white version, I felt like this one wanted to be black.
Let’s Get Started!
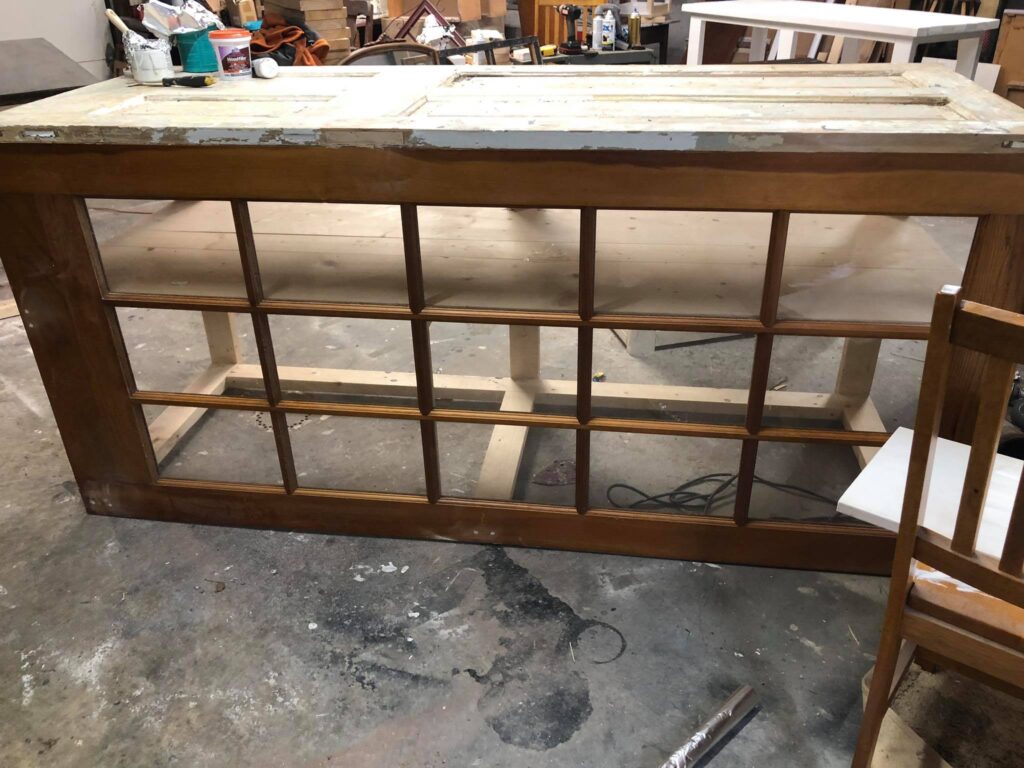
I started by sanding the door on top with my DeWalt Orbital Sander. It was very chippy and that wasn’t quite the look I wanted, so it took quite a bit of time to get it to where I was happy with it. Once I had it where I liked it, I cleaned it up and lightly sanded the French door so that it would be ready for paint. I sanded the French Door with the sanding sponge to be careful of the glass.
I apologize. The pictures aren’t the best. I had a really hard time photographing it for some reason; probably because of the size of it.
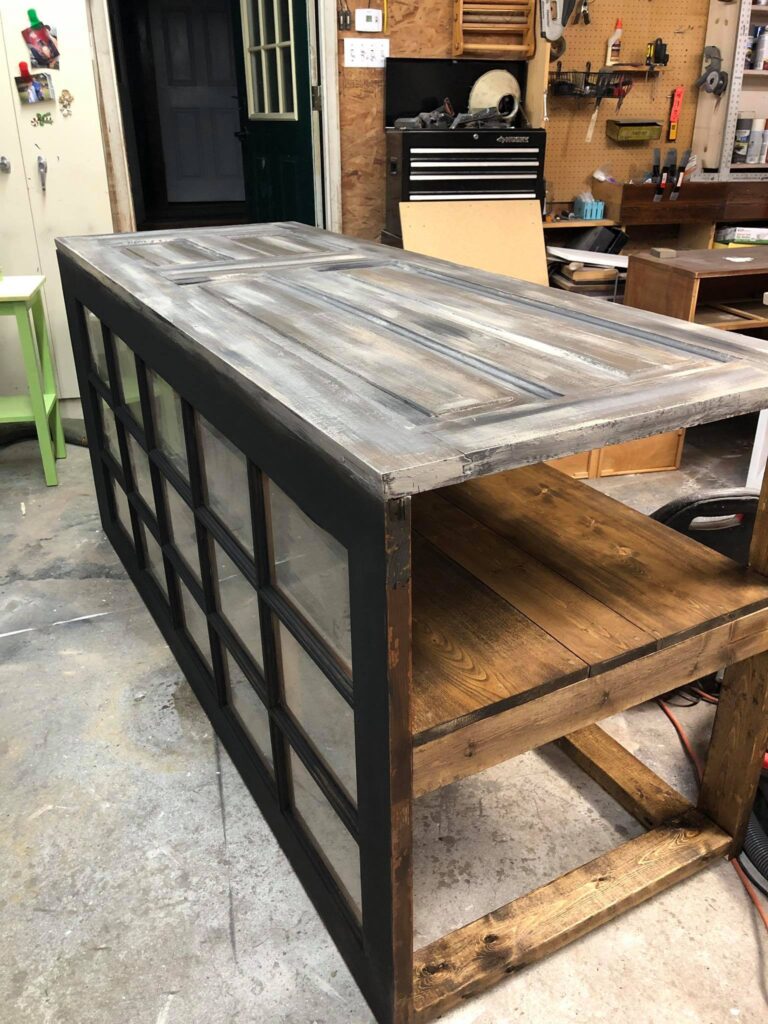
For the top, I used a mixture of paints to achieve the look. I’m planning to do a tutorial very soon on how to achieve this look. It’s hard to explain and easier to demonstrate in video.
In a nutshell, I base painted the door with “Burlap” by Dixie Belle. Then streaked over that with Miss Lillian’s Swamp Muds in Dark Brown and Dark Gray. I always go a lot heavier with the brown, because that is the main color I want to see. And then I kind of blend them a little with an old, soft rag.
Once that is all completely dry, I then go over the whole top with Miss Lillian’s “Truffle” Antiquing Glaze. Then the next day I sealed it with Minwax Fast Drying Polyurethane “Clear Satin”. I do 3 coats of that, lightly sanding between coats.
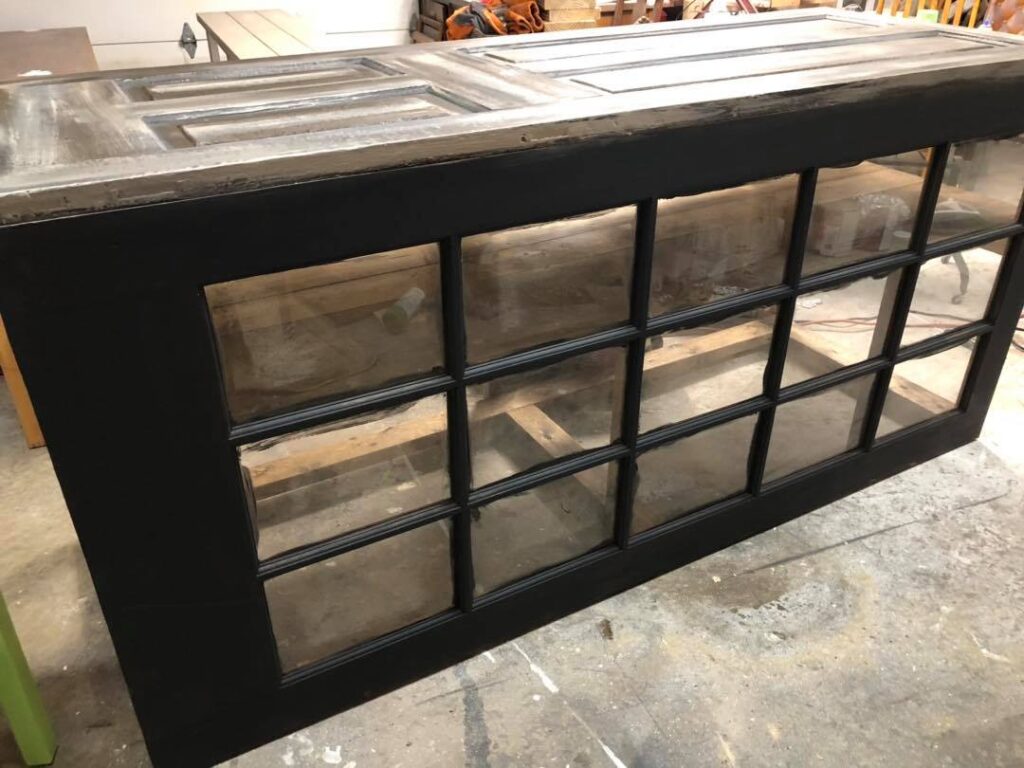
That’s the top door… now for the French door. I lightly sanded it, being very careful not to scratch the glass with the sander or sanding sponge. I have made that mistake plenty in the past.
Once the French door is lightly sanded, washed down and dried, I then painted it with Dixie Belle’s black “Caviar”. Two coats, letting dry completely before the second coat. I used the Minwax Polyurethane for sealing this also, but only one coat since I did not feel it was a high traffic area.
As for the rest of the piece…I stained it with Minwax Dark Walnut and sealed with the Minwax Polyurethane.
Supplies
This list contains affiliate links, if you make a purchase I make a commission, your price stays the same.
- DeWalt Orbital Sander – https://amzn.to/2OLree8
- Sanding Discs for Sander – https://amzn.to/37gTpYx
- Sanding Sponges – https://flippinfurnitureshop.com/products/paint-sticks-fusion
- Paint Brushes – https://amzn.to/3bwjJBt
- Dixie Belle “Burlap” Paint – https://amzn.to/2ULiacY
- Miss Lillian’s Swamp Mud – Dark Brown — https://misslillianspaint.net/product/uncle-jeffs-original-swamp-mud/
- Miss Lillian’s Swamp Mud – Dark Gray — https://misslillianspaint.net/product/uncle-jeffs-original-swamp-mud/
- Old, Soft Rag
- Miss Lillian’s Antiquing Glaze – “Truffle” — https://misslillianspaint.net/miss-lillians-antiquing-glaze/
- Minwax Polyurethane – https://amzn.to/3bz0ur1
- Dixie Belle’s “Caviar” Paint – https://amzn.to/2OPR8gy
- Minwax “Dark Walnut” Stain – https://amzn.to/2SKEwsy
I think that covers it! Such a gorgeous, solid piece! It took a little white to find its new home! Not everyone has room for a piece this size!
Don’t hesitate to ask if you have any questions or I left anything out!!

One Comment
waterfallmagazine.com
https://waterfallmagazine.com
I quite like reading through a post that can make people think.
Also, thank you for permitting me to comment!