How To Apply Transfers To A Metal File Box
Ready to transform a metal file box into something cute and fun?! Let me show you exactly how to apply transfers to a metal file box to take it up a notch!
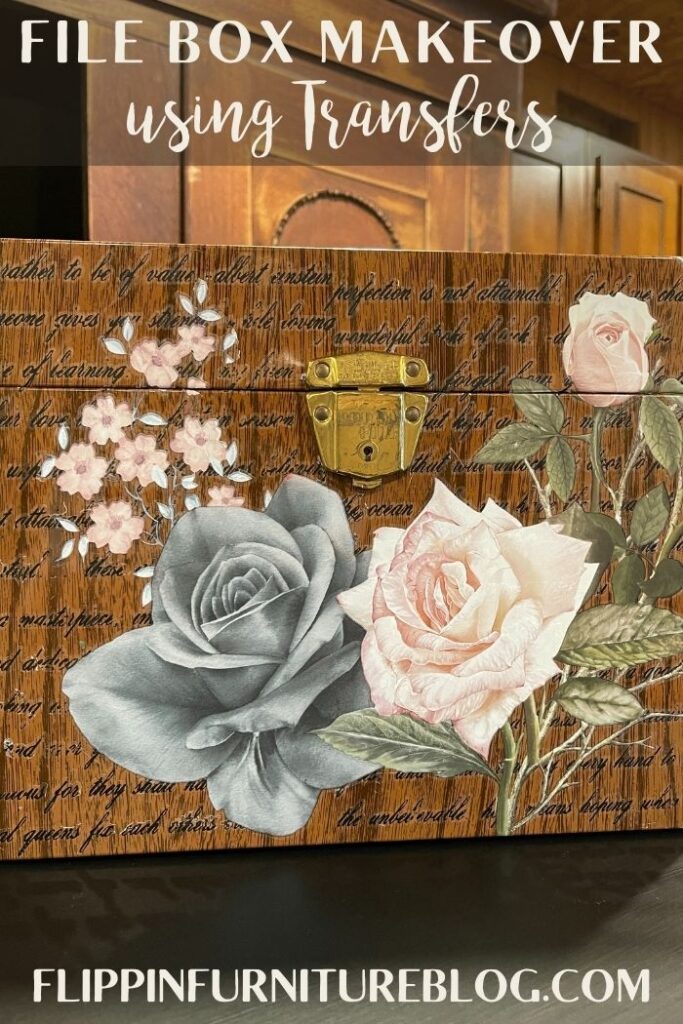
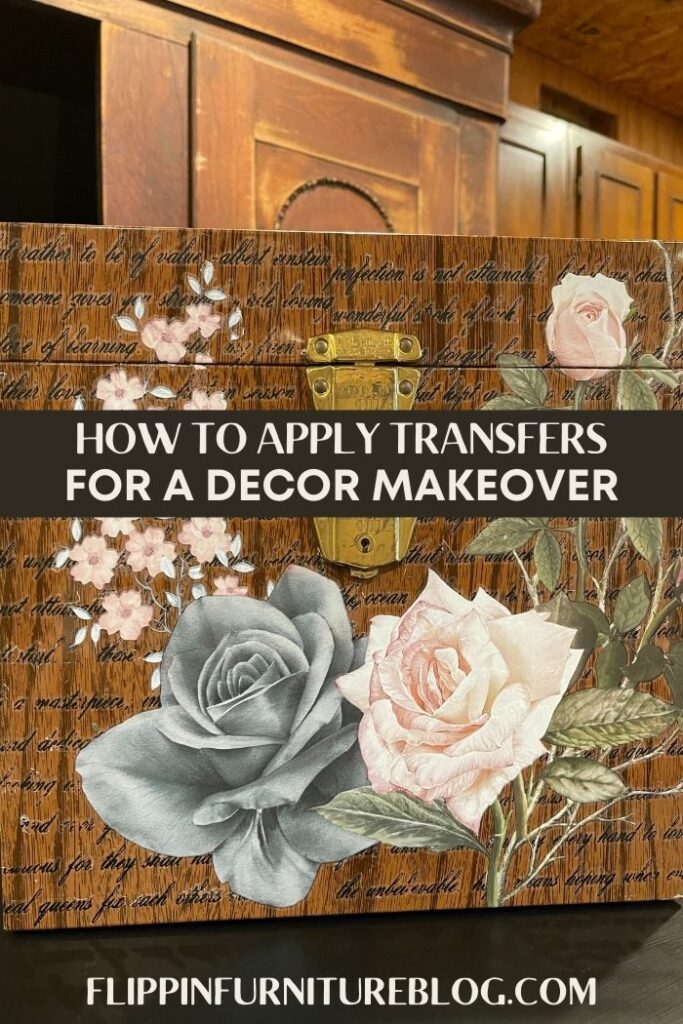
Sometimes you just have something old and boring in your stash of stuff around your house. Or you spot it at the thrift store and it catches your eye. And when you see it, you know you it can easily be transformed into something awesome in no time. That is the case with this old Metal File Box. It still has a purpose, even if it is ugly and boring. What is its purpose, y’all? I am so excited to make this my new organizing box for all of my stencils! It won’t fit them all, but it will happily hold my most used ones! Don’t you love a good organizational project? And a cute one at that? I know I do!
My stencils are going to be so happy in their new little home! Give it a good cleaning, wipe it dry, add some cute scripted and floral transfers, then bam! From boring to beautiful with not a lot of steps. I will be honest, this did take some effort, because of the SCRIPT transfer sheet. But it was worth it. Stick around with me as I show you how to step by step complete this craft. No big mess, no big worries, but a big transformation for sure. Grab your supplies and let’s get started!
Make your Own Metal File Box Makeover Using Transfer
I can’t say enough about transfers. So many options and designs out there to allow you to create anything you want based on your own personal style. They are so much fun and a really easy way to add a new flair to any piece of furniture. They even work on furniture and walls!
Completing this Metal File Box Makeover, allowed it to have a beautiful purpose again; and it was so worth it. I know my stencils will be so happy in their new home. Everybody, and everything, love to be somewhere organized and pretty too. Check out my tutorial on how to craft something like this to bring organization and a touch of pretty to your home/office/craft space.
Supplies
- Metal File Box
- Never Ending Story – (no longer available)
- ReDesign by Prima Floral Transfer Sheet (no longer available)
- Transfer Sheet Applicator
- Razor Blade
- Spray Polyurethane * optional
How to Apply Transfers to a Metal File Box
- Prep your Metal File Box by giving it a good wipe down with a baby wipe and paper towel. Make sure it is nice and dry.
- Carefully remove any stickers that might be on there. Use a razor blade to help with this.
- Determine your desired transfer sheet. Use the grid markings on there to help you line up your transfers with ease on your metal file box. I am working with a detailed script transfer sheet.
- Starting on the side of your metal file box, play with the placement of your transfer sheet. Center it if you like, place at an angle, whatever you like best. Just have fun with it and embrace the “Happy Accidents” motto.
- Once pleased with placement, remove backing. Use your flat edge tool to help you adhere your transfer to your metal file box. Press firmly as you burnish the transfer to ensure it is sticking to the metal. Wrap the transfer around your file box if you like. Be as creative as you want.
- As you are burnishing, use a razor blade to help you slice tiny spots on the sheet to help fit transfer easily around the handle and mechanical parts of the file box.
- Press firmly with your fingers as you carefully remove plastic backing. Pay attention to your edges.
- As you wrap around your file box, remove sections with scissors or a razor blade of your transfer where needed. This will help it to fit around the metal hardware on your file box.
- Stay patient as you add your transfer, as some are a little more challenging to adhere to than others.
- Continue to add your transfer sheets around your metal box, lining up where you can, your scripts, your florals, etc. You may need to cut it in sections so it is easier to work with.
- Grab some floral transfers to layer on top of your scripted transfer to add some new pops of color and a touch of lovely beauty. Use old scraps or cut sections from your main transfer sheet.
- Have fun with placement as you add them here, there, and all over. Add as much as you like.
- I did not seal my Metal File Box because it is just for me, but I am sure you could use a spray polyurethane sealer to keep your box safe.
- Place your Metal File Box with its fabulous Makeover somewhere where it is easily accessible and seen. It is too cute to hide tucked in a craft corner!

How To Apply Transfers To A Metal File Box
Materials
- Metal File Box
- Script Transfer Sheet
- Red-Design by Prima Floral Transfer Sheet
- Transfer Sheet Applicator
- Flat edge tool
- Razor Blade
- Spray Polyurethane * optional
Instructions
Prep your Metal File Box by giving it a good wipe down with a baby wipe and paper towel. Make sure it is nice and dry.
Carefully remove any stickers that might be on there. Use a razor blade to help with this.
Determine your desired transfer sheet. Use the grid markings on there to help you line up your transfers with ease on your metal file box. I am working with a detailed script transfer sheet.
Starting on the side of your metal file box, play with the placement of your transfer sheet. Center it if you like, place at an angle, whatever you like best. Just have fun with it and embrace the “Happy Accidents” motto.
Once pleased with the placement, remove backing. Use your flat edge tool to help you adhere your transfer to your metal file box. Press firmly as you burnish the transfer to ensure it is sticking to the metal. Wrap the transfer around your file box if you like. Be as creative as you want.
As you are burnishing, use a razor blade to help you slice tiny spots on the sheet to help fit transfer easily around the handle and mechanical parts of the file box.
Press firmly with your fingers as you carefully remove plastic backing. Pay attention to your edges.
As you wrap around your file box, remove sections with scissors or a razor blade of your transfer where needed. This will help it to fit around the metal hardware on your file box.
Stay patient as you add your transfer, as some are a little more challenging to adhere to than others.
Continue to add your transfer sheets around your metal box, lining up where you can, your scripts, your florals, etc. You may need to cut it in sections so it is easier to work with.
Grab some floral transfers to layer on top of your scripted transfer to add some new pops of color and a touch of lovely beauty. Use old scraps or cut sections from your main transfer sheet.
Have fun with placement as you add them here, there, and all over. Add as much as you like.
I did not seal my Metal File Box because it is just for me, but I am sure you could use a spray polyurethane sealer to keep your box safe.
Place your Metal File Box with its fabulous Makeover somewhere where it is easily accessible and seen. It is too cute to hide tucked in a craft corner!
Are Transfers Easy to Work With?
My answer is both yes, and a little bit of no! As long as you are careful as you are placing your transfer down, you will be totally fine. Remember these important tips:
- Be sure you don’t have any extra papers that could accidentally touch your sticky parts of your transfer. If they do, they will easily come off and be wasted.
- Also, try and plan out your project ahead of time, paying attention to the challenges of the metal hardware, that I forgot to account for while working on this project. Oooops. Happy little accidents are okay for me! How about you?
- The more detailed the transfer, the more time to place. (Especially the spaced out SCRIPT style, that I happen to love, but it is a pain in the booty!)
- The bigger the transfer, the easier to apply.
- Stay patient and have fun with it.
How Can I Save My Extra Transfer Sheet Pieces?
Wasting transfer sheets is not my thing. I am extra careful to keep that backing on the transfer sheets to make sure I can use those little scraps later on all sorts of other projects. I am extra careful to keep them from touching other pages too. They will easily get ruined, and then I am just plain sad. I simply keep the pieces, rolled up in the cylinder they came in. That way it is easy for me to see what designs, florals, patterns, etc. can potentially be inside my cylinder. That keeps it easier for me when working on my next project. Do not be intimidated by transfer sheets! You can easily work with them and you will love the outcome for sure. Happy crafting y’all!
Just pin this How to apply transfers to a metal file box tutorial below to find the instructions later!


You May Also Like
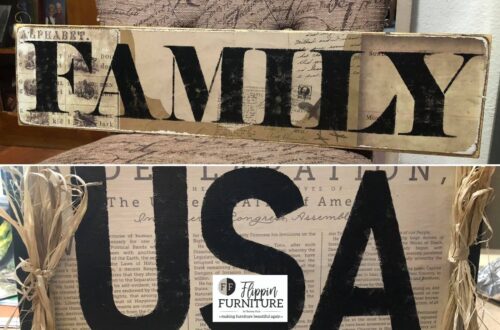
DIY Patriotic Wood Signs
Patriotic Porch Sign