How To Revamp a Mantel Clock
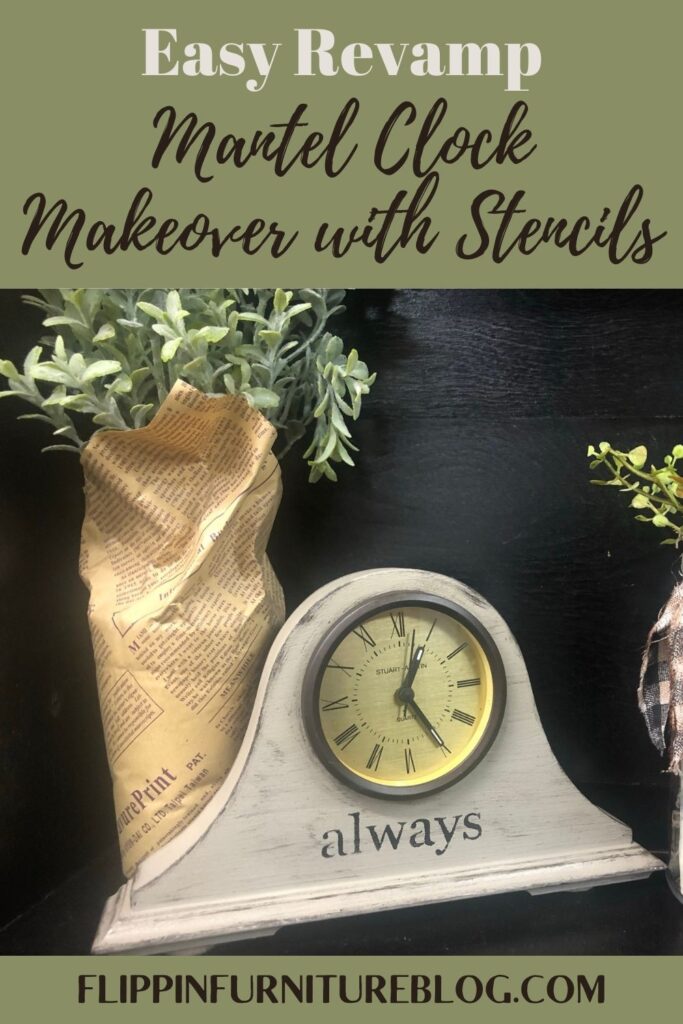
Learn how to turn a mantel clock into something new. We’ll show you an easy way to revamp a mantel clock. You will be impressed, I promise.
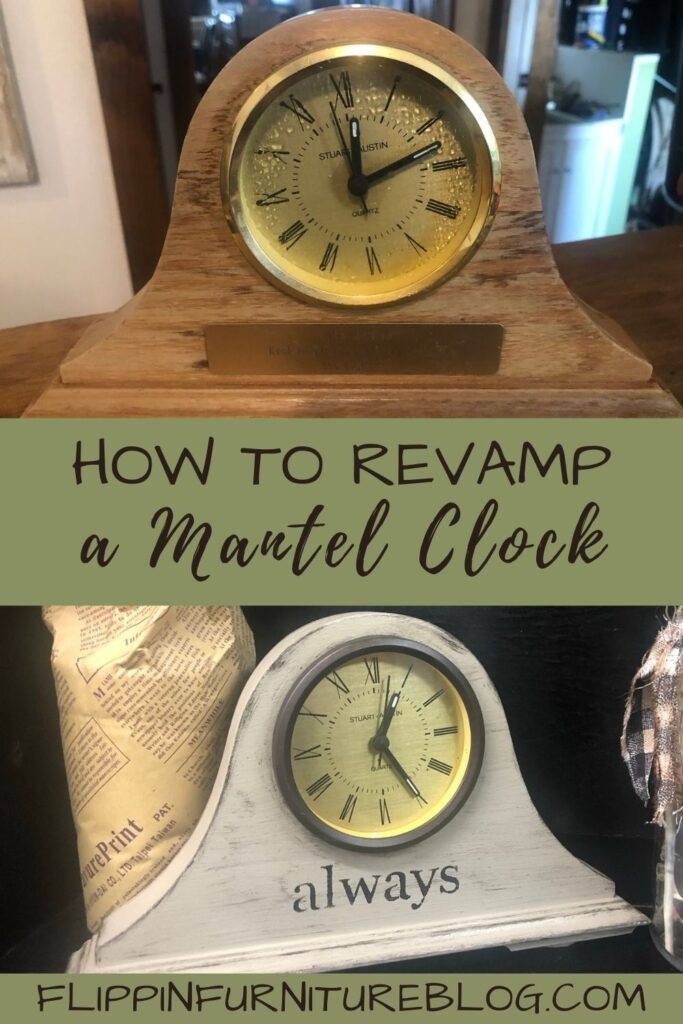
Y’all don’t you just love when you go picking through some old furniture and find a real gem? When I spotted this little, old, wooden Mantle Clock, I was so stinkin’ happy. I could totally picture it as a beauty once again. Watermarks, ugly placard on the front, and wear and tear… who cares? A makeover on this old thing was just what it needed. And I was happy to do that. And I knew it would not take much TIME at all… See what I did there?
A couple coats of paint, a stencil, and some Farmhouse style love was all it took to complete this makeover. I love how I made this clock “Alive and Ticking” once again. Ticking in terms of cuteness – an actual battery would have to help with the literal ticking! If you are wanting this same look on an old clock, grab your supplies, and let’s go! I have the step-by-step instructions for you… but do you have the time?

I love many things. My husband, my whole family, my dogs. But I can not forget my love of stencils and old furniture! Oh, I love them all. And don’t you just love how this old water-marked wooden clock can be transformed in little to no TIME? The best part of this project is how unique you can be when crafting something like this. You determine your paint color, your word to stencil, and your overall vibe. Go Farmhouse like me, or bright and Boho! It is up to you. Follow the steps below, and just be sure you are having a good TIME while doing it.
Supplies:
- Wooden Mantle Clock
- Home Stencil – “ALWAYS”
- Miss Lillian’s NO WAX Cholk Paint – Italian Lace (taupe/tan)
- *or your choice of paint color
- Paintbrush
- Spray Paint: Bronze
- Black Paint
- Ranger Tim Holtz Distress Paint Black Soot Paint Dabbers
- Paint daubers
- Heat Gun/dryer
- Sanding block
- Spray Polyurethane
Steps to Revamp a Mantel Clock Makeover
- Prep your Wooden Mantle Clock by carefully removing the innards.
- Spray paint the circular piece that helped the clock rest back in easily that you removed from the wooden base. I used a bronze color to give it the oil rubbed effect. Apply 2 coats.
- With a sanding block, rough up the wood a bit all over your mantle clock.
- Wipe clean with a baby wipe to remove debris and dust.
- Use a heat gun or blow dryer to speed up the drying process.
- Grab your desired paint color and paintbrush. Begin to cover your entire mantle clock. Don’t forget the back and bottom too.
- Allow time for your paint to dry completely. Use that heat gun or blow dryer.
- Apply 2 coats of paint to your clock. Remember to keep all of your brush strokes going the same direction. Repeat steps to dry before moving on to the next step.
- Grab your desired word to stencil on your craft. I chose the term “ALWAYS.” But you can choose what you like best. Ideas to consider: Family, gather, time, love, together, memories
- Lay your stencil down on the bottom section, making sure it is centered.
- Start applying your paint using finger daubers and gently working from top to bottom applying paint over your desired stencil area. I used a black color.
- Dry again.
- To pull out the detail of the edges, grab your black acrylic paint and your paint daubers. Lightly rub along the edges to help the black pop. Careful in the center around your circle, going a little heavier than on the outside.
- I will stop here because it is my simple farmhouse style. But if you want to add any more detail, feel free to do so. Think flowers, ribbon, jute, etc. just be creative and have fun.
- Once completely dry, apply a top coat to seal your hard work with your fast drying Minwax Spray Polyurethane.
- Pop back in your clock innards when dry and determine what to pair it with on your mantle?
So cute! But, hmmm. A plant? A candle? Maybe a sign? Check out this tutorial for an idea.
Why Do You Want To “Rough Up” the Wood?
Roughing up the wood, with a sanding block or anything gritty, is so important for many reasons:
- It removes any finish that may be on your wood to begin with to give it a clean base to start
- It helps removes any scratches or tiny dents to give a more even surface
- Most importantly, it allows the new paint to adhere easily.
Can I Glaze the Face of the Clock?
For this type of clock face, I would say NO. Since the face is so slick, I don’t think anything would easily adhere to it. It might be possible to add a rusting effect on there, but I think it turned out great as is. But you know me, I do enjoy a distressed look all the time, so that is a great question!

How To Revamp a Mantel Clock
Learn how you can revamp your old mantel clock using paint and stencils.
Materials
- Wooden Mantle Clock
- Home Stencil - “ALWAYS”
- Miss Lillian’s NO WAX Cholk Paint - Italian Lace (taupe/tan)
- *or your choice of paint color
- Paintbrush
- Spray Paint: Bronze color
- Black Paint
- Ranger Tim Holtz Distress Paint Black Soot Paint Dabbers (link)
- Paint daubers (amazon)
- Heat Gun/dryer
- Sanding block
- Spray Polyurethane
Instructions
- Prep your Wooden Mantle Clock by carefully removing the innards.
- Spray paint the circular piece that helped the clock rest back in easily that you removed from the wooden base. I used a bronze color to give it the oil rubbed effect. Apply 2 coats.
- With a sanding block, rough up the wood a bit all over your mantle clock.
- Wipe clean with a baby wipe to remove debris and dust.
- Use a heat gun or blow dryer to speed up the drying process.
- Grab your desired paint color and paintbrush. Begin to cover your entire mantle clock. Don’t forget the back and bottom too.
- Allow time for your paint to dry completely. Use that heat gun or blow dryer.
- Apply 2 coats of paint to your clock. Remember to keep all of your brush strokes going the same direction. Repeat steps to dry before moving on to the next step.
- Grab your desired word to stencil on your craft. I chose the term “ALWAYS.” But you can choose what you like best. Ideas to consider: Family, gather, time, love, together, memories
- Lay your stencil down on the bottom section, making sure it is centered.
- Start applying your paint using finger daubers and gently working from top to bottom applying paint over your desired stencil area. I used a black color.
- Dry again.
- To pull out the detail of the edges, grab your black acrylic paint and your paint daubers. Lightly rub along the edges to help the black pop. Careful in the center around your circle, going a little heavier than on the outside.
- I will stop here because it is my simple farmhouse style. But if you want to add any more detail, feel free to do so. Think flowers, ribbon, jute, etc. just be creative and have fun.
- Once completely dry, apply a top coat to seal your hard work with your fast drying Minwax Spray Polyurethane.
- Pop back in your clock innards when dry and determine what to pair it with on your mantle?
Just pin this How to revamp a mantel clock tutorial below to find the instructions later!


