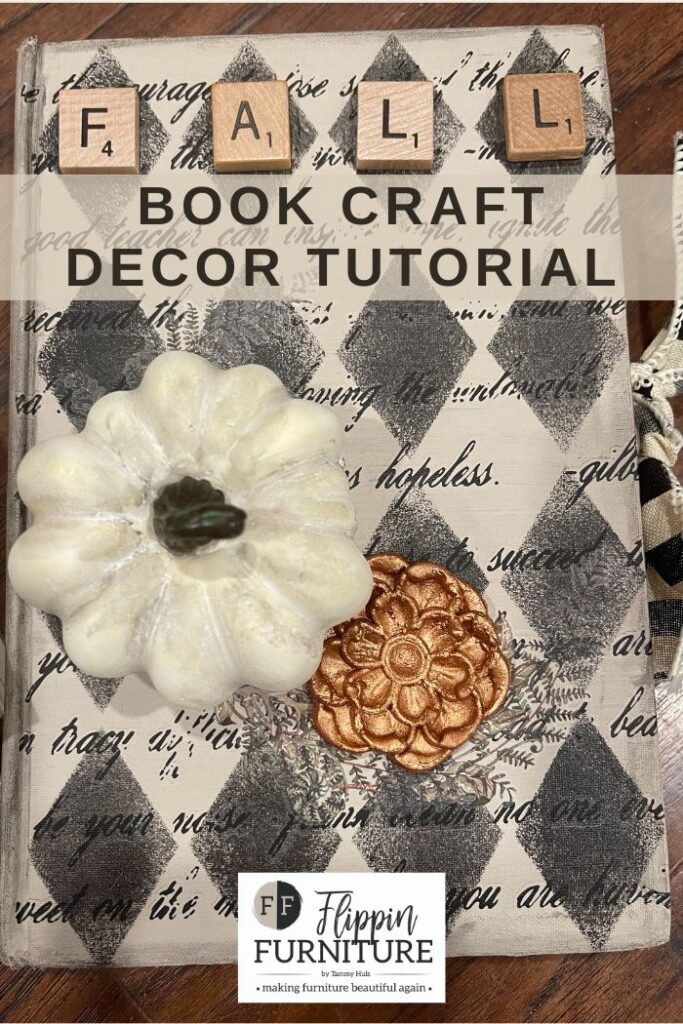
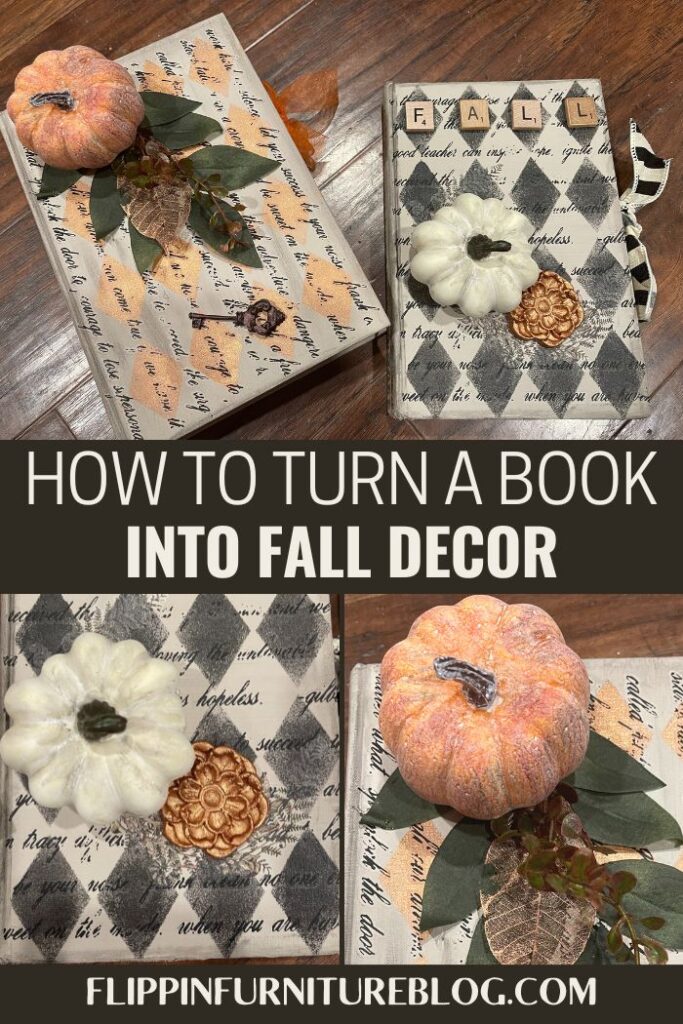
How to Turn a Book into Fall Decor
You know me and my love for upcycling old windows, furniture, and wood of all sizes. Well, this DIY fall decor book craft tutorial where I show you how to take an old book and turn it into the cutest new piece in your Fall Decor collection is fabulous.
It turned out so cute, right? Simple from start to finish and budget friendly through and through. You can’t go wrong with that. That is my kind of DIY, y’all. It fits right in with all the rest of my farmhouse decor. If you want to learn How to Turn a Book into Fall Decor with me, then let’s get started!
Old books can be found anywhere, y’all… garage sales, thrift stores, dollar stores, or your grandma’s attic. They are there, so go find yourself a good one to get started making this super cute and simple DIY. No matter the size, this craft is super customizable. Are you ready to give it a try? Let me show you how.
Make your Book into Fall Decor
Big ones, little ones, fat ones, thin ones. Just find a nice hardbound book and bam! We can get to make your boring old book turn into something beautiful. It will add to your beautiful fall decor in no time. The best part of this is that you get to pick your base color, your stencil pattern, your added transfers, and embellishments to make this fit your style.
My list of supplies is there to mimic or customize. You too can make your own Fall Decor from a book in less than an hour. Just follow these simple steps below.
If you are looking to make your Fall Decor Book with neutral colors like mine or bolder, it is completely up to you. Maybe you even want to try and create this look with a creepy vibe.
You know, more for an addition to your Halloween decor instead. Do it! That would be extra cute, too. However you want to create your book, it is totally up to you. I am here to give you the basics and support to get it done! Are you ready to get to work?
Supplies:
- Old Solid Hardback Book
- Fusion’s Raw Silk Mineral Paint
- Harlequin Stencil
- Script Transfer
- Fusion’s Coal Black Mineral Paint
- Fall Transfer Sheet
- WoodUbend Mouldings
- Pumpkins
- Finger Daubers
- Old Scrabble Letters
- Mod Podge – Matte
- Titebond Quick and Thick
- Brass Hardware Acrylic Paint
- Blackberry Acrylic Paint
- Hot Glue gun
- Heat gun
- Scissors
- Ribbon – My affiliate link for DecoExchange
How To Make A Fall Decor Book Craft
- Grab your old book and wipe free of any dust and debris.
- Paint a solid coat of tan on the back of your book to begin. Be sure to cover the entire back cover, even the little sides that show by the pages. You might need 2 coats depending on the original color of your book. Don’t forget your spine.
- Dry completely before moving on. Use a heat gun to speed up the drying process.
- Flip over to the front cover and paint as well. Let dry completely.
- Apply your Harley Diamond Stencil on the book, holding it in place as you use a finger dauber to add a thin layer of black paint.
- Dry with a heat gun.
- Apply a Mod Podge sealer to help your transfer sheet attach with ease. If you don’t do this step, it is okay if you are going for a more vintage look.
- Apply your Script transfer sheet over your dry book cover. Use a flat edge to press firmly. Remove plastic backing.
- Determine which transfer to add to your spine fits your desire. It is ok to mix and match. I added the word HARVEST in the center of the spine to mine.
- Attach your Scrabble letters spelling out FALL with Titebond Wood Glue. Play with placement. A little goes a long way folks, but good thing it does dry clear.
- Decide your fern transfer sheet piece and apply at an angle to add some new texture to the book.
- Grab your tiny brush and apply the Brass Hardware color to your open petal flower WoodUBend Moulding. (No need to bend since the surface is flat.) Dry completely.
- Attach your flower with a bit of hot glue and Titebond to help secure it.
- Add your white pumpkin with both forms of glue.
- Cut 2 strips of ribbon and attach to the inside of both the front and back covers. Be careful to have them line up as best as possible. Use hot glue to secure.
- Once dry. Tie your ribbon with a double knot or bow if you want that fancy look. Cut your ribbon tails at an angle.
Do You Ever Change Your Mind Mid-Project?
This question makes me chuckle because that happens just about every time I craft, y’all. I might have an overall vision in mind, but once I get started, I let my creative juices flow.
Playing with placement as I craft is part of the joy. I love to utilize as much as I can from my craft stash as well, because I do not believe in wasting anything, ever. So, to answer that question, YES!
My mind is always with this project. I was looking to keep things muted and neutral a bit to go with my home decor. But you do not have to do that. If you are looking for a bit more boldness to this DIY project, simply add a base coat of white to your cardboard letters before adding your decoupage paper.
This super simple step will help change the look of your project in a drastic, but beautiful way. What do you think… should I have added a coat of paint underneath or not?
I am so pleased with how cute this little DIY turned out. This craft will be so cute on my mantle. I could even add it to my bookshelf to add some extra cuteness. And wouldn’t these be so fun to give as gifts? Y’all, this project is one to repeat for sure.
Looking for some fun and crafty DIY home decor ideas? Look no further than the Flippin Furniture blog. We have tons of tutorials to help you with everything from crafting to furniture makeovers.
And be sure to follow us on Facebook for even more inspiration.
Love our crafting tutorials and want be apart of a crafting community? Join the Flippin Society today!

How to Turn a Book into Fall Decor
Materials
- Old Solid Hardback book
- Fusion's Raw Silk Mineral Paint
- Finger Daubers
- Harlequin Stencil
- Heat Gun
- Hot Glue Gun
- Never Ending Story Transfer
- Fusion's Coal Black Mineral Paint
- Acrylic Paint Blackberry, Brass Hardware
- Foliage Collector Stencil
- Pumpkins
- Old Scrabble Letters
- Mod Podge
- Titebond Quick and Thick
- Scissors
- Ribbon
- WoodUbend Petal Flower
- Key
Instructions
- Grab your old book and wipe free of any dust and debris.
- Paint a solid coat of paint on the back of your book to begin. Be sure to cover the entire back cover, even the little sides that show by the pages. You might need 2 coats depending on the original color of your book. Don’t forget your spine.
- Dry completely before moving on. Use a heat gun to speed up the drying process. Flip over to the front cover and paint as well. Let dry completely.
- Apply your Harlequin Diamond Stencil on the book, holding in place as you use a finger dauber to add a thin layer of black paint. Dry with a heat gun.
- Apply a Mod Podge sealer to help your transfer sheet attach with ease. If you don't do this step, it is okay if you are going for a more vintage look.
- Apply your Script transfer sheet over your dry book cover. Use a flat edge to press firmly. Remove plastic backing. Determine which transfer to add to your spine that fits your desire. It is ok to mix and match. I added the word HARVEST in the center of the spine to mine.
- Attach your Scrabble letters spelling out FALL with Titebond Glue. Play with placement. A little goes a long way folks, but good thing it does dry clear.
- Decide your fern transfer sheet piece and apply at an angle to add some new texture to the book.
- Grab your tiny brush and apply the Brass Hardware color to your open petal flower Moulding. (No need to bend since the surface is flat.) Dry completely
- Attach your flower with a bit of hot glue and Titebond to help secure. Add your white pumpkin with both forms of glue.
- Cut 2 strips of ribbon and attach on the inside of both the front and back covers. Be careful to have them line up as best as possible. Use hot glue to secure.
- Once dry. Tie your ribbon with a double knot or bow if you want that fancy look. Cut your ribbon tails at an angle
Video
Just pin this fall decor book craft tutorial below to find the instructions later!


You May Also Like
Simple USA and Family DIY Wood Sign Tutorial

Window Floral Arrangement