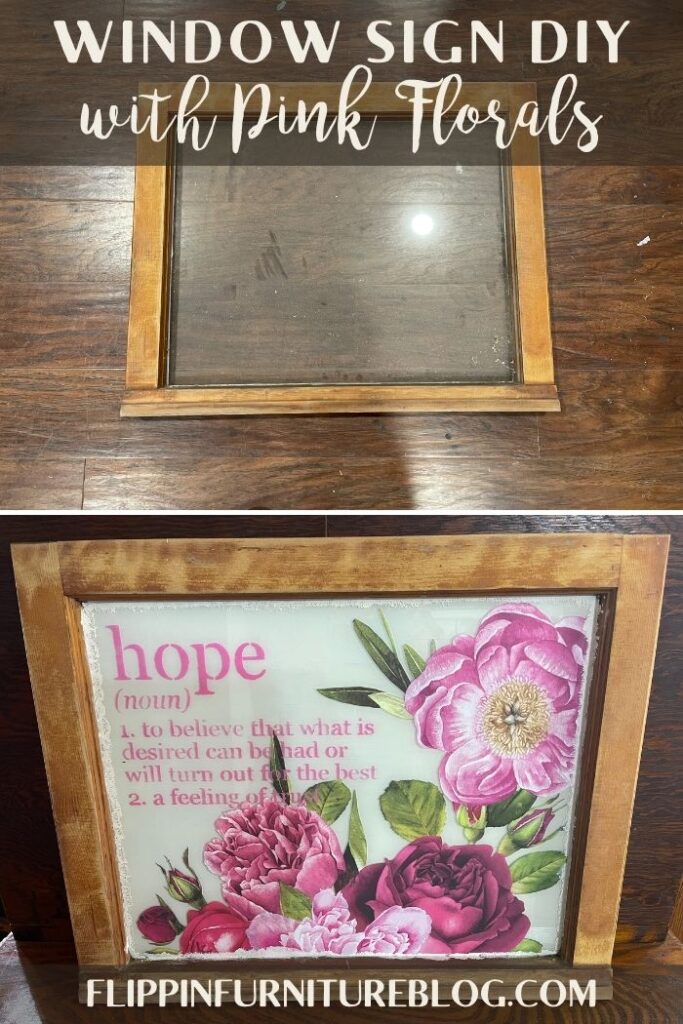
DIY Floral Window Using Transfers
Love the look of using a transfer to make your own floral window sign? Learn how to make your own using stencils with my step by step tutorial.
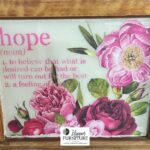
This simple DIY window is a perfect way to spread awareness, all year long. Using these beautiful, big bold pink florals, and a stencil of HOPE will help to serve as a reminder. This craft is a beauty, not just in its looks, but in what it stands for as well.
All you need is a few things for y’all to create this look. An old window, some paint color of your choosing, a stencil, and transfers. Oh and a little bit of time! What do you think? Want to make it? Then let’s get started. Check out how I did it step by step in my tutorial below. You will have your own DIY Breast Cancer Awareness Window in less than an hour.
Breast Cancer Pink Floral Window Using Transfers
I love to craft home decor that is beautiful, eye-appealing, and a statement piece. But I also love to craft something that is meaningful. It makes it even more special. Being able to select my own stencil and transfers allows me to personalize this sign exactly how I want it.
Picking the paint colors and coordinating flowers will help this sign be a unique treasure for whoever is the owner. Can’t you just imagine how special it would be to be given as a gift to someone who is fighting a hard battle? It would also be great to auction off at a fundraiser surrounded by all those pink ribbons. I can also envision it as a lovely decor in your guest bedroom/bathroom. Follow these steps below to make your own Breast Cancer Window.
Supplies:
- Old Glass Window
- Rust-Oleum 2X Spray Paint Blossom White
- Lush Floral I – Prima Transfer (no longer available)
- Hope Stencil – The Stencilsmith
- Sponge Daubers
- Master’s Touch Acrylic Paint
- Heat Gun
- Transfer Tool
- Paintbrush
- Minwax Polyurethane
How To Make Your Own DIY Floral Window Using Transfers
- Prep your window by cleaning the glass on both sides.
- Apply a coat of paint onto the back of your glass. You determine the color you want to match your home decor. I selected white, but a pale pink would look beautiful too.
- Dry completely and then apply the 2nd coat. Dry again.
- Flip over your window and wipe any excess debris that may be on there.
- Paint the window frame if you choose. I kept mine the wood look. You decide what you like best.
- Determine which window stencils and Prima transfers you wish to apply. Play with placement based on the size of your window, transfers, and stencils.
- Cut out the transfers you need from your main sheet.
- Use a razor blade to help clean your window one last time to ensure your glass is nice and clean.
- Rest your pink floral rub on transfer directly onto the glass. Be careful as you place it because once it sticks, it is on there. Press firmly with the flat edge tool to help it adhere perfectly.
- Once applied, slowly peel back your plastic film to reveal your transfer. Go back and push down in spots that might need a little more pressure.
- Run your fingers over the transfer to ensure you have no air bubbles.
- Next, lay your HOPE stencil down on your window, paying attention to the placement.
- With your pouncers or finger daubers, begin to press your paint gently into your stencil. I used pink to tie into the flowers.
- Once you are done filling in the stencil, pull it up carefully. You can add a bit of white to help your letters pop, but I like the way it looks as is.
- Completely dry your paint with a heat gun before you add another floral transfer in your open areas of the window.
- Grab the perfect transfer that will fit best in your open space. Remember you can cut your transfers and layer them as well. I don’t like to waste, so little pieces work great. Just have fun with it and be creative.
- Add a bit of white paint along the inside of your window, resting right next to your frame. This hides any crooked cuts on the transfer. It also adds a new texture to the piece.
- Finally, spray your wood frame board with a Minwax polyurethane spray to seal, being sure not to get on the glass.
- To maintain the beauty of your window, use a Swiffer to lightly dust it. No water or Windex on the glass from now on!
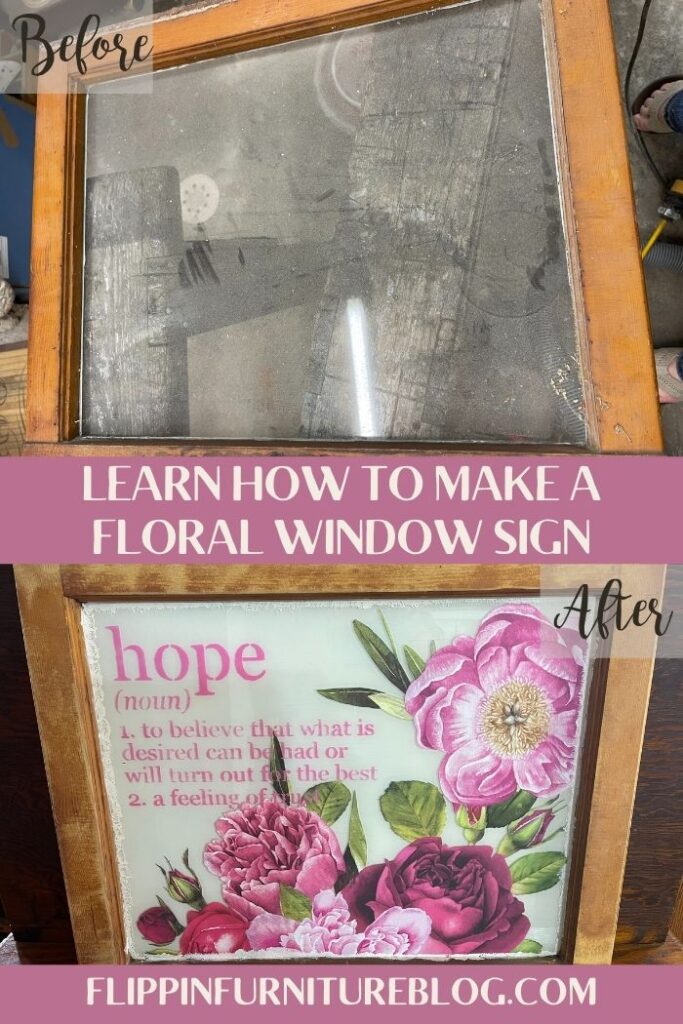
Do You Have to Paint a Color on the Back of Your Window’s Glass?
In order to have your stencils/transfers really stand out, you should paint a coat, or 2, of a neutral color on the back of your window’s glass. You could decide you don’t want to do this step. That is totally fine. The color of your wall will show through if you don’t paint your glass. But I prefer painting the back to allow for the details to be really pop! Which style do you like best?
What If I Make a Mistake While Applying My Transfer?
Y’all! I do this all the time. And that is why I love working with these transfers. You might make a mistake by accidentally removing your plastic backing too soon. Or even pulling it off too quickly. No worries. Simply disguise it by applying another little transfer piece over the top. Can you even see the mistake I made on here with the leaf? I bet you can’t! You could also hide it with the stencils you apply, as well. Happy little mistakes can always be fixed, so don’t stress.
DIY Floral Window using Transfers
Materials
Instructions
- Prep your window by cleaning the glass on both sides.
- Apply a coat of paint onto the back of your glass. You determine the color you want to match your home decor. I selected white, but a pale pink would look beautiful too.
- Dry completely and then apply the 2nd coat. Dry again.
- Flip over your window and wipe any excess debris that may be on there.
- Paint the window frame if you choose. I kept mine the wood look. You decide what you like best.
- Determine which window stencils and transfers you wish to apply. Play with placement based on the size of your window, transfers, and stencils.
- Cut out the transfers you need from your main sheet.
- Use a razor blade to help clean your window one last time to ensure your glass is nice and clean.
- Rest your pink floral rub on transfer directly onto the glass. Be careful as you place it because once it sticks, it is on there.Press firmly with the flat edge tool to help it adhere perfectly.
- Once applied, slowly peel back your plastic film to reveal your transfer. Go back and push down in spots that might need a little more pressure.
- Run your fingers over the transfer to ensure you have no air bubbles.
- Next, lay your HOPE stencil down on your window, paying attention to the placement.
- With your pouncers or finger daubers, begin to press your paint gently into your stencil. I used pink to tie into the flowers.
- Once you are done filling in the stencil, pull it up carefully. You can add a bit of white to help your letters pop, but I like the way it looks as is.
- Completely dry your paint with a heat gun before you add another floral transfer in your open areas of the window.
- Grab the perfect transfer that will fit best in your open space. Remember you can cut your transfers and layer them as well. I don’t like to waste, so little pieces work great. Just have fun with it and be creative.
- Add a bit of white paint along the inside of your window, resting right next to your frame. This hides any crooked cuts on the transfer. It also adds a new texture to the piece.
- Finally, spray your wood frame board with a miniwax polyurethane spray to seal, being sure not to get on the glass.
- To maintain the beauty of your window, use a Swiffer to lightly dust it. No water or Windex on the glass from now on!
Video
Just pin this DIY Floral Window using Transfers tutorial below to find the instructions later!