Two Super Easy Easter Crafts!
No joke. I’m almost embarrassed to show you these! Almost.
They can be customized to your color choices and home décor.
I have recently started doing Facebook “lives” daily. I think I did day six today, and am going for at least 10. Maybe 30 days. Maybe not.
We shall see!
All of these were done mostly on those Facebook Lives.
The carrot project was first.
So super simple.
THE EASTER CARROT
I started with a scrap piece of wood and painted it brown.
While the paint dried, I started looking through my orange scrapbook papers and found one I liked.
Then I drew a rough outline of a carrot and cut it out. I didn’t want it perfectly cut, so I used my crappy old scissors. You know the kind that you have used to cut the wire too many times?
Yeah, those scissors. That was the look I was going for!
I used my black paint dabber to go around the edge of the carrot cutout.
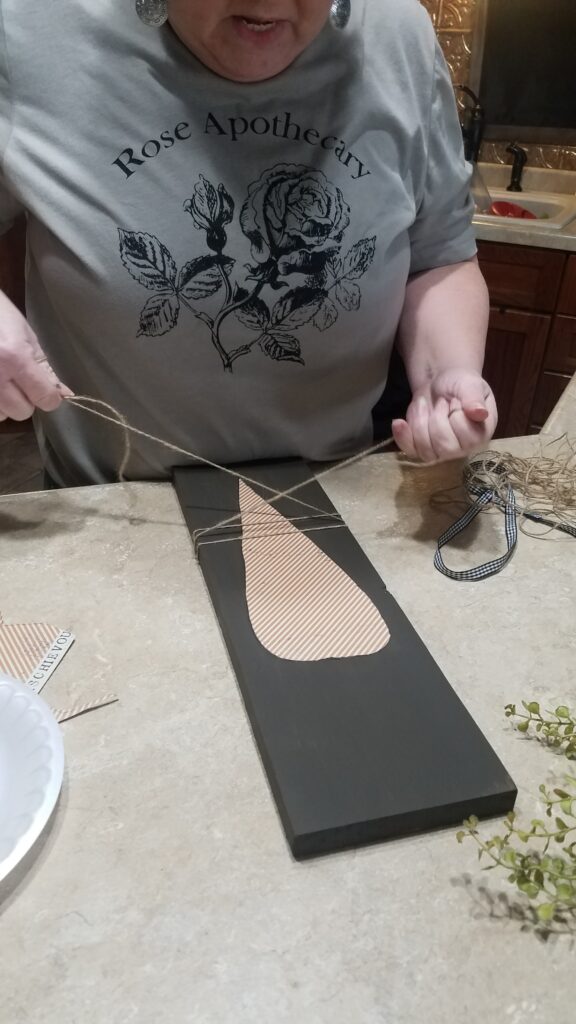
I glued down the carrot to the board using mod podge and added some faux greenery for the tops with hot glue.
Then I wrapped some twine around the top and the bottom. I did put a little drop of hot glue under the knots to keep it secure.
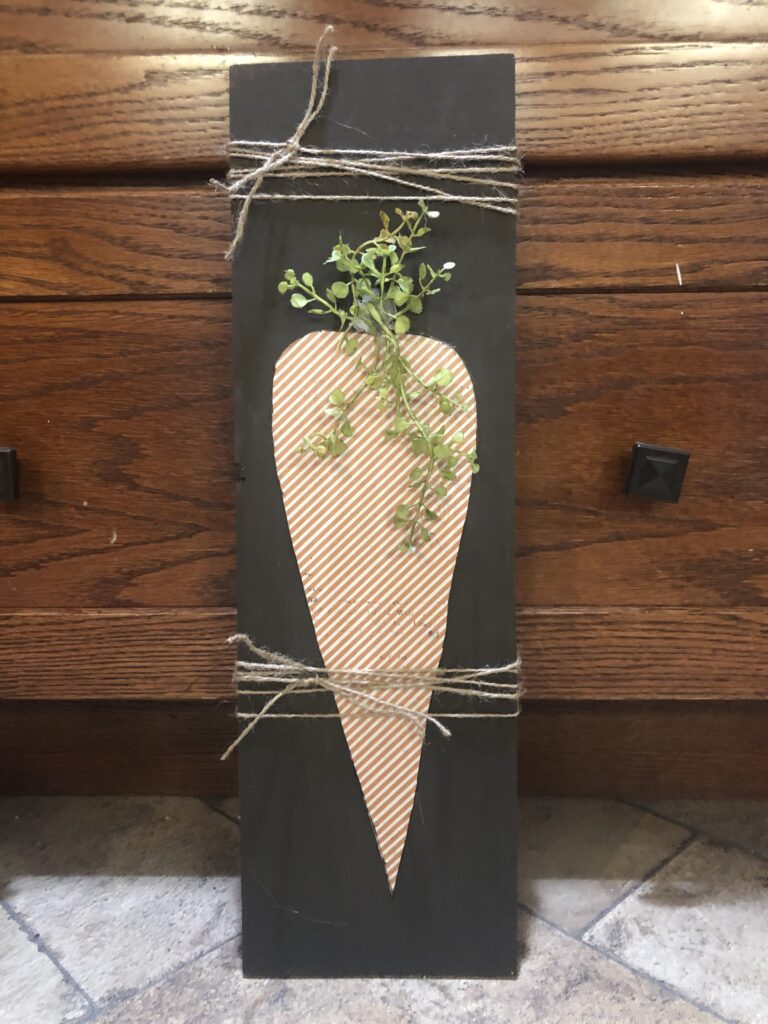
Done!
Supplies I Used:
- Scrap Piece of Wood
- Orange Scrapbook Paper
- Black Dauber – https://amzn.to/2UbUdJH
- Faux Greenery
- Mod Podge Matte – https://flippinfurnitureshop.com/products/mod-modge-matte-notions
- Twine – https://flippinfurnitureshop.com/products/jute-cord-notions?_pos=1&_sid=65d8ac4b2&_ss=r
- Scissors
- Hot Glue Gun – https://amzn.to/390ovVv
Easy, peasy, right!?!
Let’s throw another one in here real quick! It uses a lot of the same supplies!
I love how these bunnies turned out! My house is mainly neutrals, so I chose to do more of a “farmhouse” neutral theme. But feel free to go more Easter traditional if that is more you!
——————————————————————————————————————————————————–
FARMHOUSE STYLE BUNNIES
First, I painted around the edges of all the bunnies with black paint.

Once the paint was dry, I laid my bunnies down on the scrapbook paper. I had black and white polka dot, black and white gingham, and tan and white polka dot. I traced around the shapes (bunnies) and cut them out. I always cut inside the line about an eighth of an inch so that when I lay it on my piece, it won’t be hanging over.
And if you do find that yours hangs over, you can either cut it a little more or sand it off later.
Once cut, mod podge your scrapbook papers onto your bunnies. Working from the middle out, you want to work out any air bubbles or excess mod podge from under the paper. This little gold credit card looking piece is perfect for just that! I have actually used a kitchen spatula in a pinch many times!
At this point, I couldn’t decide if I was done or not yet. I sanded the edges just a little, all the way around. I ended up deciding to do some random stamping on them. Most of my stamps are about as old as my kids. We are talking 20 plus years old. So I tried to give you links to the ones I could find and others that were kind of close-ish. And I took a picture of the ones I used in case that helps.
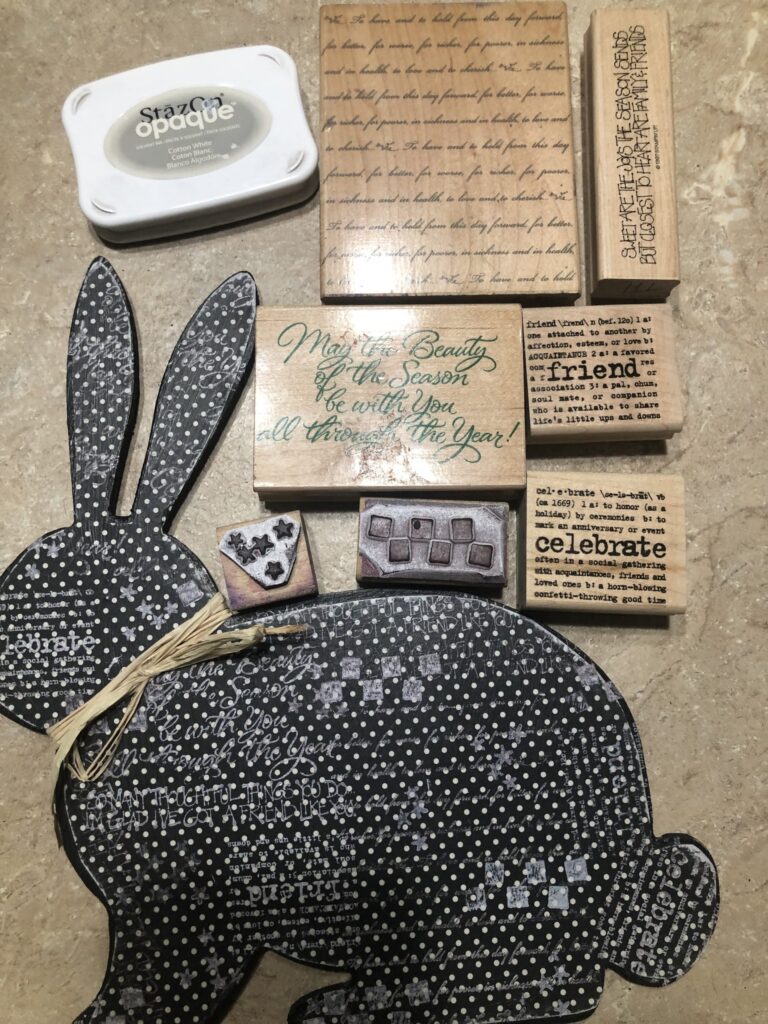
I used Staz On ink in opaque white. This is good stuff. Once, on a piece of furniture a long time ago, I stamped a bunch of different stamps on the top of a smallish side table. It looked amazing. They were painted white with French script stamps in black. I can still see it in my mind. But that is the only place. Because I had used regular stamp ink, it wiped off! When I touched it, it would smear! I was dumbfounded! Or maybe just dumb? Anyway, regular ink is fine for most craft projects, but I highly recommend the Staz On for this! It dries quickly!
So, paper on and stamping done.
Once I had the papers on, I waited maybe 10 minutes and put another coat of mod podge over the top.
Then let dry completely.


The last step was adding the raffia around the necks. I used a little dot of glue again to keep the raffia in place.
And that’s it, that’s all Folks!
Supplies I used for the Bunnies:
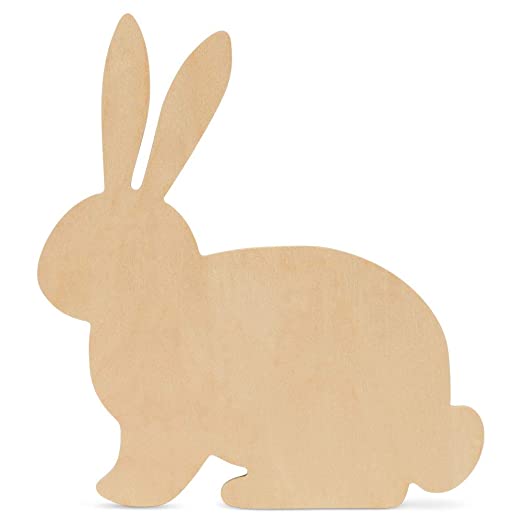
- Wood Bunny Cutouts 6-inch x 3-inch, Pack of 3 Unfinished Wood from Amazon – https://amzn.to/3b2sCBs
- Large Wood Rabbit Cutout 12-inch x 10-3/4-inch, Pack of 3 Unfinished Wood – https://amzn.to/3b1oj9S
- Black Paint (Dixie Belle’s Caviar) – https://amzn.to/3aVDRM0
- Squeegee – https://flippinfurnitureshop.com/products/decoupage-felt-squeegee-flippin-furniture?_pos=1&_psq=sq&_ss=e&_v=1.0
- Scrapbook Papers
- Mod Podge Matte – https://amzn.to/2vqm5Sd
- White Opaque Staz On – https://amzn.to/2U5rCWA
- Scissors
- Sanding Sponge
You May Also Like
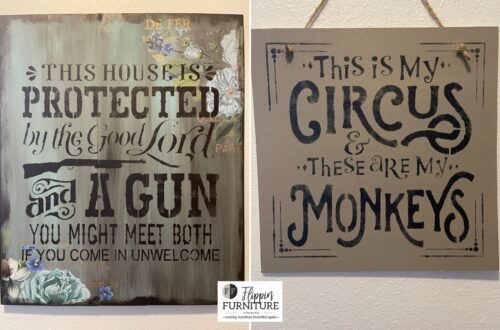
DIY Wood Signs For Your Home
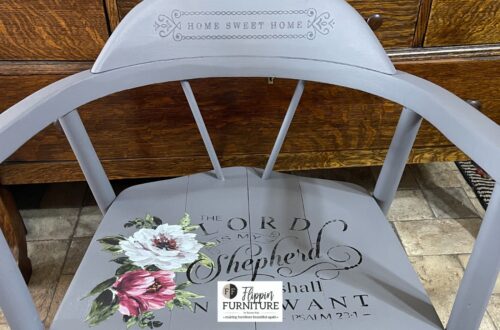
How to: Old Chair Makeover
