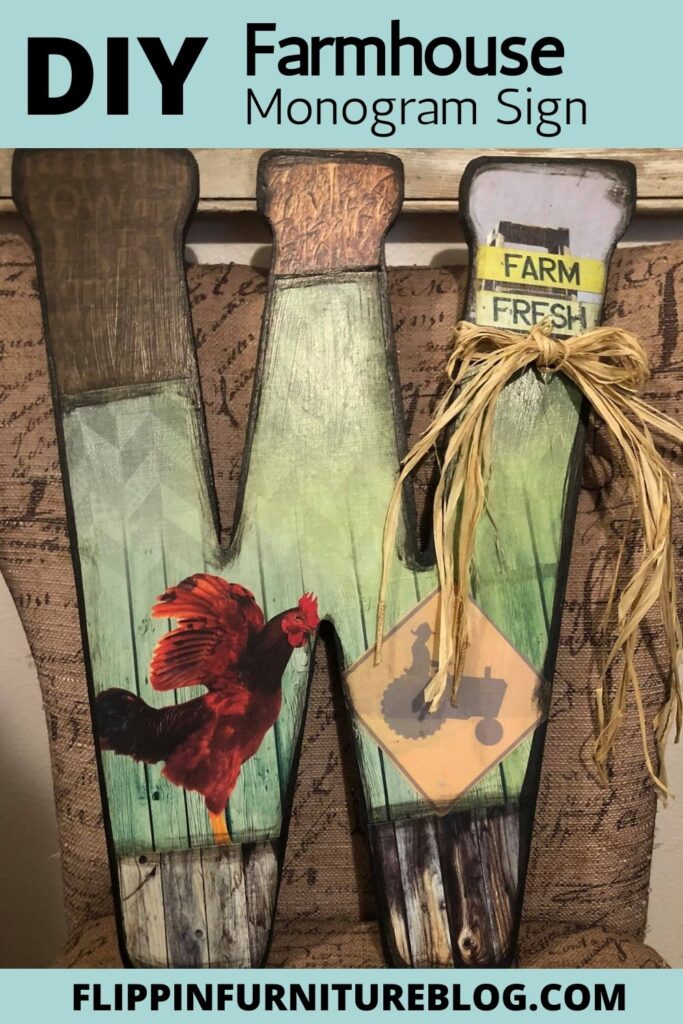
DIY Farmhouse Monogram Sign
I am loving the farmhouse look I have in my home currently and wanted to add something else to my gallery wall. I was thinking a monogram letter would be a great addition. Follow along as I show you how I made a DIY farmhouse monogram sign that was the perfect touch to add to my farmhouse decor.
If you are looking for an easy way to add some more farmhouse décor to your home then this is exactly what you are looking for. With just a large wooden letter and very few supplies you will have a finished sign in less than an hour.
DIY Farmhouse Monogram Sign
I am loving how this DIY farmhouse sign turned out and can’t wait to display it in my home. I am OBSESSED with how amazing it turned out! What a great addition to the farmhouse decor I already have around my home!
For this project, I used a monogram large wooden letter. I also used scrapbook paper, mod podge, and a few other small supplies. Check out the video below to see how I created this monogram sign.
Supplies You’ll Need:
- Large Wood Letter
- Farm Scrapbook paper – wood, barns, horses, wheat, corn, etc.
- Mod Podge
- Brush
- Squeegee Vinyl Scraper or any flat edge tool
- Heat Drying Gun
- Sanding block or nail file
- Black ink Sponge Paint
- Raffia or twine
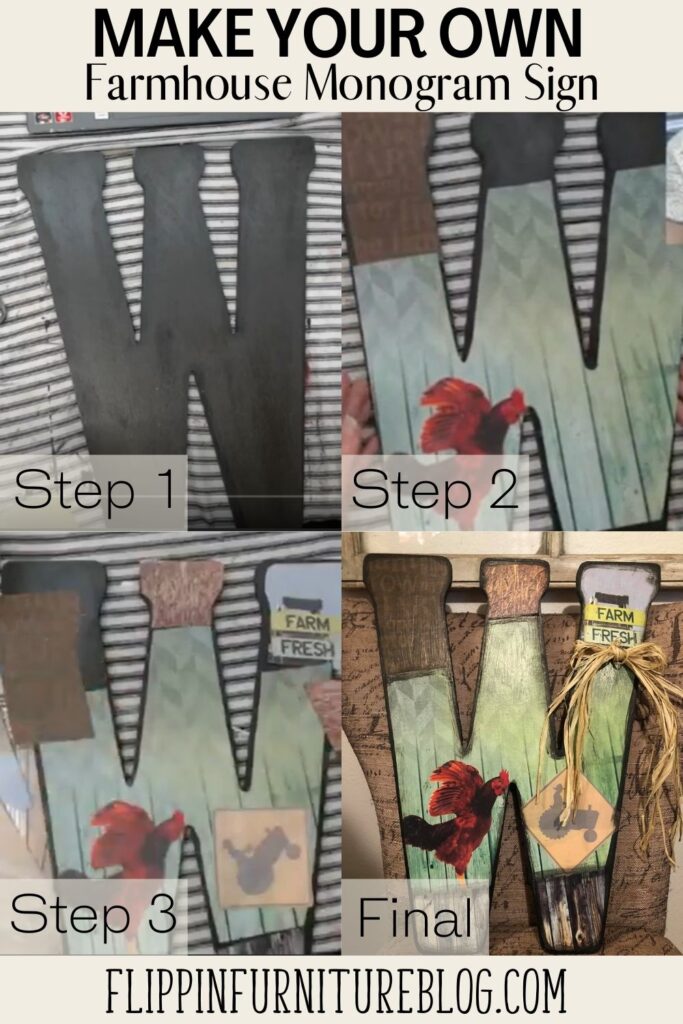
STEPS FOR YOUR FARMHOUSE MONOGRAM:
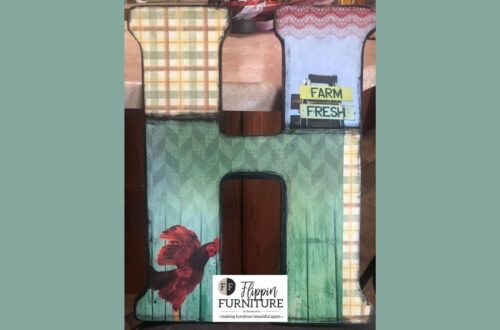
Step 1: Beginning with your painted and prepped wooden letter, decide what scrapbook pages you want for your project. Mix and match pages; just have fun with it.
Step 2: Working in sections on your letter, place your scrapbook paper underneath to trace a portion. Then cut it out and set on your wooden letter.
Step 3: Grab your next scrapbook page, and trace out the next section you want to cover. Play with it to create the look you like.
Step 4: Be sure to trim the outside edges of your scrapbook pages to ensure there is just a bit of wood showing through as you work.
Step 5: Continue to trace and cut farmhouse themed scrapbook pages to cover any remaining sections of your wooden letter.
Step 6: Once you have cut all of your scrapbook pages to fit and cover your wooden letter, play with placement to ensure you like your design before you mod podge in place.
Step 7: Grab your Mod Podge and brush directly on your letter in your first section you are covering with paper.
Step 8: Attach your first section of scrapbook paper. Use your squeegee vinyl scraper to remove any air bubbles and even out all of your glue, to really help seal all the edges.
Step 9: Repeat these steps with remaining scrapbook pages, overlapping sections where needed.
Step 10: Once all of your scrapbook pages are on your letter, paint Mod Podge over the top. Be sure to cover it completely, with a thin, consistent layer.
Step 11: Use a heat drying tool to speed up the drying process.
Step 12: With your sanding block, roughen up the edges of your letter by rubbing along the sides with some pressure. Be careful not to tear your scrapbook pages.
Step 13: Use a nail file to fit into the tiny/tight edges of your wooden letter.
Step 14: Brush off excess debris with your hand.
Step 15: Grab your black ink sponge paint thingy , and go along the edges of your wooden letter and any spots where your scrapbook pages meet to distress the edges and make it look cohesive.
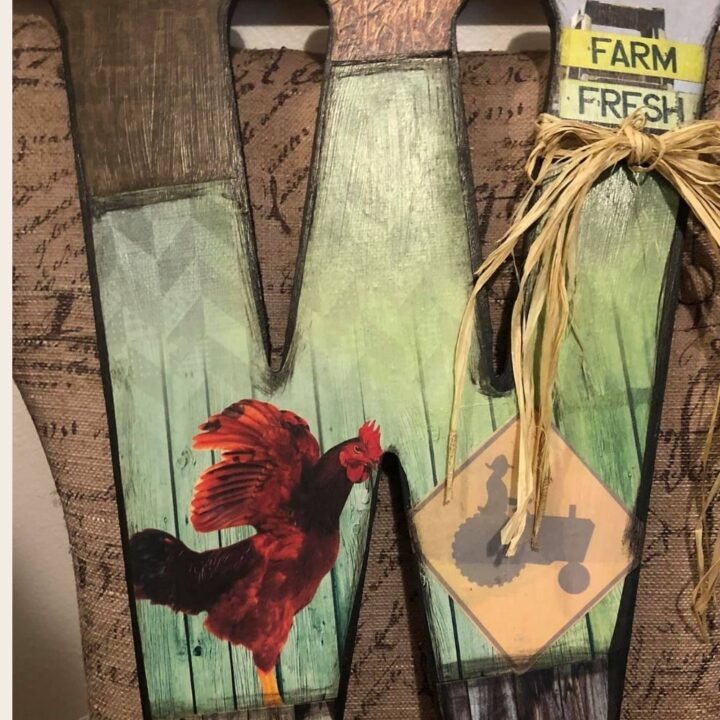
Step 16: Grab a handful of raffia and tie it on your letter, making a bow. Trim your tails to the length you like. Hot glue in place to secure.
DIY Farmhouse Monogram Sign
Learn how to make your own farmhouse style monogram sign!
Materials
- Large Wood Letter
- Farm Scrapbook paper - wood, barns, horses, wheat, corn, etc.
- Mod Podge
- Brush
- Squeegee Vinyl Scraper or any flat edge tool
- Heat Drying Gun
- Sanding block or nail file
- Black ink Sponge Paint
- Raffia or twine
Instructions
STEPS FOR YOUR FARMHOUSE MONOGRAM:
- Beginning with your painted and prepped wooden letter, decide what scrapbook pages you want for your project. Mix and match pages; just have fun with it.
- Working in sections on your letter, place your scrapbook paper underneath to trace a portion. Then cut it out and set on your wooden letter.
- Grab your next scrapbook page, and trace out the next section you want to cover. Play with it to create the look you like.
- Be sure to trim the outside edges of your scrapbook pages to ensure there is just a bit of wood showing through as you work.
- Continue to trace and cut farmhouse themed scrapbook pages to cover any remaining sections of your wooden letter.
- Once you have cut all of your scrapbook pages to fit and cover your wooden letter, play with placement to ensure you like your design before you mod podge in place.
- Grab your Mod Podge and brush directly on your letter in your first section you are covering with paper.
- Attach your first section of scrapbook paper. Use your squeegee vinyl scraper to remove any air bubbles and even out all of your glue, to really help seal all the edges.
- Repeat these steps with remaining scrapbook pages, overlapping sections where needed.
- Once all of your scrapbook pages are on your letter, paint Mod Podge over the top. Be sure to cover it completely, with a thin, consistent layer.
- Use a heat drying tool to speed up the drying process.
- With your sanding block, roughen up the edges of your letter by rubbing along the sides with some pressure. Be careful not to tear your scrapbook pages.
- Use a nail file to fit into the tiny/tight edges of your wooden letter.
- Brush off excess debris with your hand.
- Grab your black ink sponge paint thingy , and go along the edges of your wooden letter and any spots where your scrapbook pages meet to distress the edges and make it look cohesive.
- Grab a handful of raffia and tie it on your letter, making a bow. Trim your tails to the length you like. Hot glue in place to secure.
Give this DIY craft try. These would be the perfect gift to give for bridal showers, or as birthday presents. You can personalize each letter just for them by choosing scrapbook paper that matches their likes and styles.
Just pin this Farmhouse Monogram Sign tutorial below to find the instructions later!


You May Also Like

Memorial Day Floral Arrangement On The Fly
How to Stencil on Metal