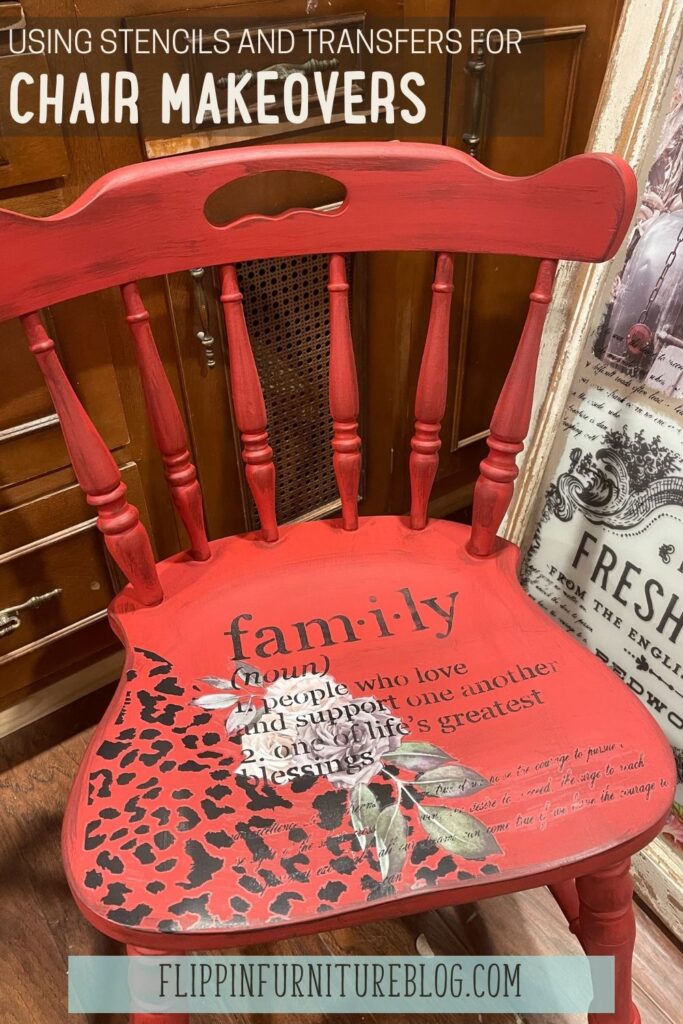
How to makeover a chair using a stencil
Have any old chairs around the house that need a little TLC? With some paint, stencils, and some transfer paper, you can learn how to give your chair a makeover and make it like new again! This project is a simple and easy tutorial you’ll enjoy and takes you less than 40 minutes to do!
If you have some chairs that need a little love then you will want to watch this chair makeover tutorial. I know you have seen a chair that needs some love and I have several I have been needing to paint and spruce up. I am showing you today how to do a chair makeover with stencils using paint and stencil to turn your old chairs into something amazing.
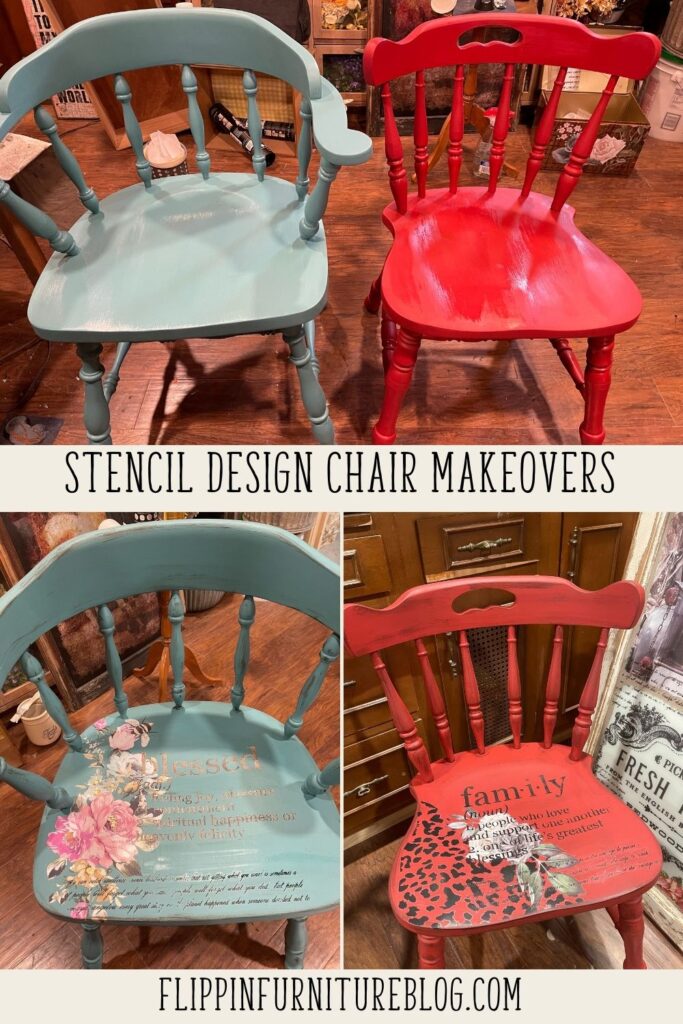
Stencil Design Chair Makeover
This technique is quite possibly my favorite way to makeover a chair. I love using stencils especially when it comes to making wood signs. Stencils can really take the stress out of crafting by helping you create words and designs on your projects.
Supplies for Red Chair:
- Old wooden chair (Red)
- Family Stencil
- Never Ending Story Transfer (no longer available)
- Leopard Transfer
- Any old bits and pieces of transfers you like
- Floral and greenery transfers
- Transfer applicator tool or flat edge
- Black paint
- Rag
- Miss Lillian’s Antiquing Glaze (Black)
- Redesign Decor Transfer – Ruby Rose – no longer available
Supplies for Turquoise Chair:
- Old wooden chair (Turquoise)
- Blessed Stencils
- Redesign Decor Transfer – Fuschia Sunset
- Transfer applicator tool or flat edge
- Master’s Touch Acrylic: Raw Umber
- Master’s Touch Acrylic: Warm Grey
- Miss Lillian’s Antiquing Glaze (Brown)
- Rag
Steps for chair makeover with stencils:
Red Chair –
Step 1: Beginning with your painted and prepped wooden chair (Barn Red from Dixie Bell), decide which transfers you hope to mix and match on your chair. Play with your patterns, sizes, and images to create a fun look. We may or may not use all of them, or may not. We will decide as we get going.
Step 2: Grab your leopard transfer and shape it to fit the corner of your chair. Trim excess. Peel the white backing of your transfer and place it on your chair in the front left corner of the seat of your chair.
Step 3: Use a transfer applicator tool, or flat edge stick to apply transfer. A bubble will appear as it adheres to your wood. Once completely on your chair, rub with your hand to smooth out any air bubbles.
Step 4: Play with placement of your floral and greenery on top of your leopard print. Apply greenery transfers using the same flat edge tool. Remember to leave space for your floral to rest on top.
Step 5: Apply your floral transfer on top of your greenery transfers. Eyeball how you think it will look best.
Step 6: Next apply your Never Ending Story Script Transfer, resting on top of greenery and a small area of your floral. If it is not perfect, don’t worry.
Step 7: Grab your black paint, sponge daubers, and play with the placement of your FAMILY stencil. Holding in place, begin to dab your paint. Be sure to let it dry completely.
Step 8: Grab your rag and add a tiny portion of your antiquing glaze to it. Decide where you want it to be. I like it on the edges of the seat, the spindles, and the back of the chair. Don’t forget the legs of your chair. This will just tone down the bright paint of your chair.
Step 9: Feel free to “Grunge it up” however you like.
Step 10: If you place too much, use a baby wipe to pull the glaze back.
Step 11: Set your red chair aside to dry as you begin to work on your turquoise chair.
Turquoise Chair –
Step 1: Grab your Redesign Floral Transfers: Fuchsia Sunset. Determine which part of your transfer you want to add to your chair.
Step 2: Cut out the transfer section you like best. Be sure to cut as close as possible for your transfers and wrap on your wood where needed.
Step 3: Carefully remove white paper backing and place your transfer down on the left side of the seat.
Step 4: Repeat steps to apply transfer with flat edge. A bubble will appear as it adheres to your wood. Once completely on your chair, rub with your hand to smooth out any air bubbles.
Step 5: Determine and eyeball placement of your Blessed stencil.
Step 6: Apply a small section of a script transfer under where you will paint on your stencil following the steps above.
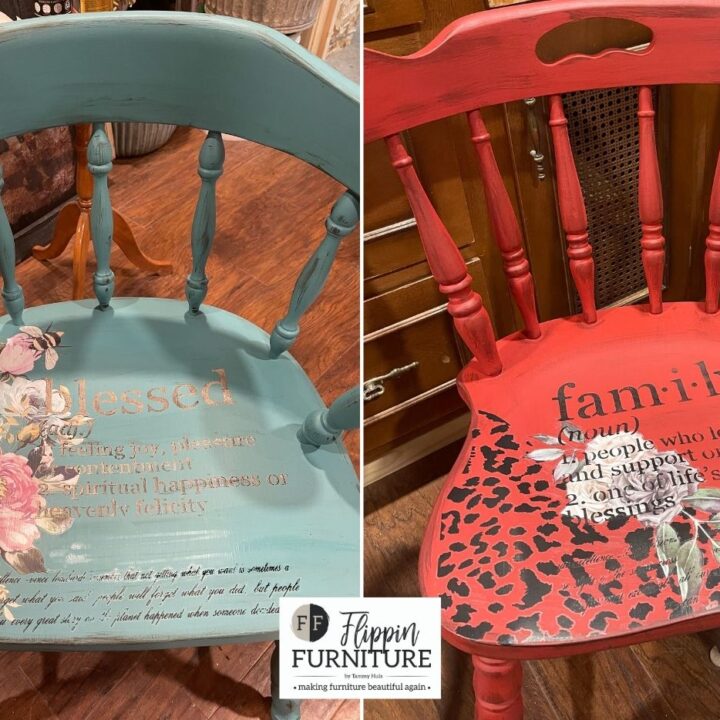
DIY Red Chair Makeover
Ready for an easy and enjoyable project? Check out this tutorial that will show you how to give your old chair a makeover, but using stencils. It's inexpensive and takes less than 40 minutes.
Materials
- Old wooden chair (Red)
- Family Stencil
- Neverending Story Transfer
- Leopard Transfer
- Any old bits and pieces of transfers you like
- Floral and greenery transfers
- Transfer applicator tool or flat edge
- Black paint
- Rag
- Miss Lillian’s Antiquing Glaze (Black)
- Redesign Decor Transfer - Ruby Rose
Instructions
- Beginning with your painted and prepped wooden chair (Barn Red from Dixie Bell), decide which transfers you hope to mix and match on your chair. Play with your patterns, sizes, and images to create a fun look. We may or may not use all of them, or may not. We will decide as we get going.
- Grab your leopard transfer and shape it to fit the corner of your chair. Trim excess. Peel the white backing of your transfer and place it on your chair in the front left corner of the seat of your chair.
- Use a transfer applicator tool, or flat edge stick to apply transfer. A bubble will appear as it adheres to your wood. Once completely on your chair, rub with your hand to smooth out any air bubbles.
- Play with placement of your floral and greenery on top of your leopard print. Apply greenery transfers using the same flat edge tool. Remember to leave space for your floral to rest on top.
- Apply your floral transfer on top of your greenery transfers. Eyeball how you think it will look best.
- Next apply your Never Ending Story Script Transfer, resting on top of greenery and a small area of your floral. If it is not perfect, don’t worry.
- Grab your black paint, sponge daubers, and play with the placement of your FAMILY stencil. Holding in place, begin to dab your paint. Be sure to let it dry completely.
- Grab your rag and add a tiny portion of your antiquing glaze to it. Decide where you want it to be. I like it on the edges of the seat, the spindles, and the back of the chair. Don’t forget the legs of your chair. This will just tone down the bright paint of your chair.
- Feel free to “Grunge it up” however you like.
- If you place too much, use a baby wipe to pull the glaze back.
- Set your red chair aside to dry as you begin to work on your turquoise chair.
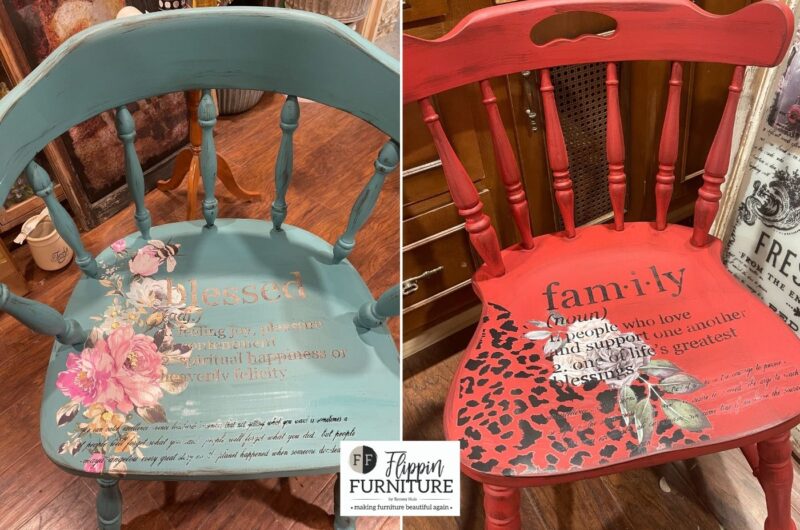
DIY TURQUOISE CHAIR MAKEOVER
You’re tired of looking at your old, scuffed up chair that’s been passed around the family for years. Here are some simple steps you can take to give it a makeover and have something new again!
Supplies
Old wooden chair (Turquoise)
Blessed Stencils
Redesign Decor Transfer – Fuschia Sunset
Script Transfer
Bee Transfer
Transfer applicator tool or flat edge
Master’s Touch Acrylic: Raw Umber
Master’s Touch Acrylic: Warm Grey
Miss Lillian’s Antiquing Glaze (Brown)
Rag
Instructions
- Grab your Redesign Floral Transfers: Fuchsia Sunset. Determine which part of your transfer you want to add to your chair.
- Cut out the transfer section you like best. Be sure to cut as close as possible for your transfers and wrap on your wood where needed.
- Carefully remove white paper backing and place your transfer down on the left side of the seat.
- Repeat steps to apply transfer with flat edge. A bubble will appear as it adheres to your wood. Once completely on your chair, rub with your hand to smooth out any air bubbles.
- Determine and eyeball placement of your Blessed stencil.
- Apply a small section of a script transfer under where you will paint on your stencil following the steps above.
- With a bit of brown paint (Raw Umber) and your pouncer, dab your stencil in place on your chair. Be sure to hold it in place.
- Check as you dab to be sure your paint is consistent.
- Use a hair dryer to speed up the drying process of your stencil.
- Grab your tan paint, (Warm Grey) and your pouncer to add a bit of femininity to your stencil.
- Offset your stencil just a bit, as you place it on again, to add some dimension.
- Dry again completely. We would hate to mess up your hard work.
- Apply your bee transfer in your previously placed floral transfer. Rub him down securely with your hand.
- To antique your chair a bit, grab your brown glaze and a rag. Repeat steps to “Grunge it up” where you think is best. Sides of chair, back, spindles, underside, etc.
- If you apply too much glaze, use a baby wipe to soften it a bit.
I just love how these turned out and it is so much fun using a stencil to transform a chair. Can’t wait for you to try this technique and start flipping your own furniture!
Just pin this chair makeover with stencils tutorial below to find the instructions later!


You May Also Like

Quick and Easy DIY Christmas Sign
Memorial Day Floral Arrangement On The Fly