DIY Hot Cocoa Bar
Learn how to style your own DIY Hot Cocoa bar that will for sure knock the socks off of any guest you have this holiday season.
A Hot Cocoa bar is just what you need to add the finishing touches to your decorations for that holiday party you are planning. I love how easy a hot cocoa bar is to throw together. The ease comes from the items you already have at home. You likely do not know it, but everything you need is already in your possession or can simply be bought on a budget from a thrift store. Step back and watch as I show you how a hot cocoa bar can add that special touch and bring a fun vibe to any party.
How To Make Your Own Hot Cocoa Station
With some cute finds from thrifting, a few homemade wood signs, and cute little jars you are ready to get started. You may even have everything you need already in your own home. This isn’t a hard thing to do trust me! You might not think you can but if I can do it you can surely can too!
Follow along as I walk you through exactly how to style and set up your own Hot Cocoa Bar station.
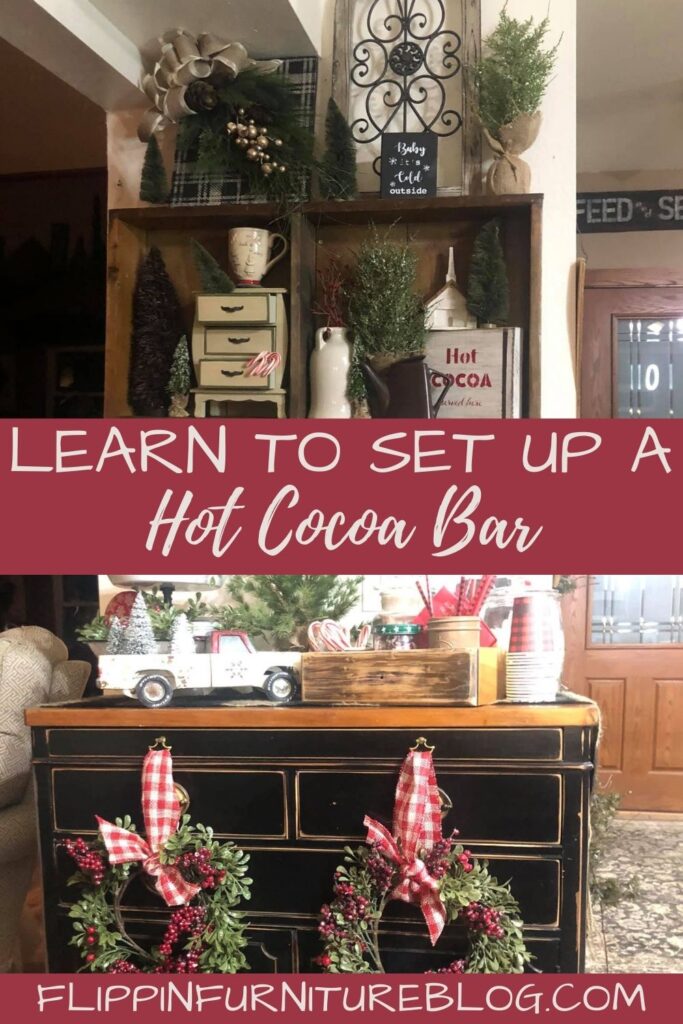
How To Set Up A Hot Cocoa Bar
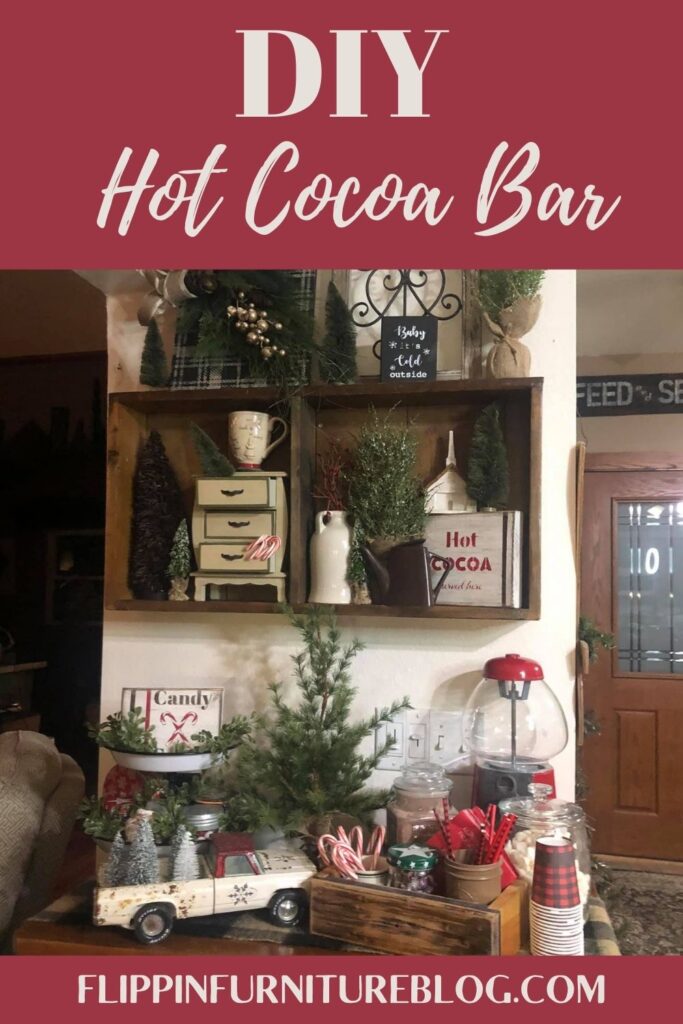
Using my little mini buffet as the perfect spot for my hot cocoa bar I got to work decorating. You can use anything really to make your hot cocoa bar. You could use a side table, countertop, or an old microwave table. I am sure you have the perfect place in your home if you just look around!
Once I found the perfect spot I got to add all the decorations I had gathered up. On the left side, we have trees, a vintage jewelry box from the Salvation Army. A garage sale mug that I bought so long ago that I don’t even remember.
On the right side is a crock pitcher that I turned to the back. I did this because the writing on there is blue and did not go with anything else. More trees. Little brown pitcher came from a thrift store at some point.
On top of the buffet is a little white-tiered tray. Filled with a vintage red snowflake tin, little jars with red and white m&m’s, kisses, etc., plus another little sign I made, and some greenery to fill it out. The greenery would look cute with some white spray paint on it to look like snow. I didn’t do that but might go back and change it.
The vintage Christmas truck came from a thrift store. They are the perfect place to find vintage-looking items to use on these types of projects. I am always on the hunt for a good thrift store find.
Once you have your decorations in place it is time to start placing your containers around that hold all the fixins. I am mostly using glass jars, but again you can use what you have.
I grabbed a little bitty drawer and put a coffee mug in it. Then added a couple jars with candy canes, straws, and some napkins in there. And there is a jar with marshmallows.
I suggest adding a runner to your table if you are looking to bring a pop of color out. You don’t have to go out and buy anything fancy. I bet you’d be surprised to hear that mine is actually a scarf!
Just be creative and use what you have on hand. I promise you there is no right or wrong way to make a Hot Cocoa bar. Everyone loves hot cocoa. As long as you have some mugs, cocoa mix, and a few toppings everything will be well within their souls.
Make your own Wood Signs
These signs for sure help add the final touches to any hot cocoa bar. They bring in cute but fun pieces to the decor. You can easily make these DIY hot cocoa signs and add your own personality or them to the signs.
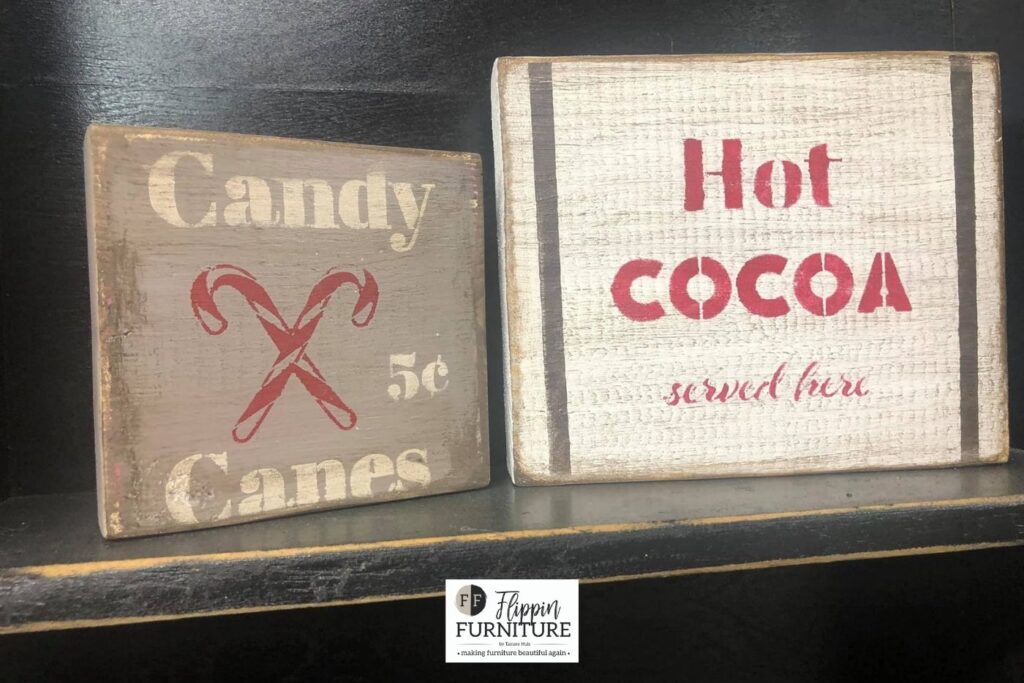
Once you have your cute signs made, some glass jars, and have purchased all our cocoa supplies you are ready!
Time to get styling your own DIY hot cocoa bar. Enjoy the memories you will make as you and your guest share laughs and small talk. All while sipping on some of the best hot cocoa they have ever had.


You May Also Like
My New Staging Wall!
Graduation Party Ideas,